

Currently, the segment of making money from affiliate marketing in Vietnam is still very attractive.
More and more businesses have realized the importance of affiliate marketing. Therefore they are actively participating in the affiliate marketing network.
Today’s article I will guide you to set up a personal website to make money from affiliate marketing from AZ.
The article is aimed at those who are not proficient in creating websites, using WordPress.
The model that I guide is to make an authority site. In short, a website with a theme.
Often people when creating a website to make money from affiliate marketing only focus on making a discount code website.
I’ve seen a lot of websites doing it. Moreover, updating the discount code is also a bit difficult. Although AccessTrade has released a plugin that automatically gets discount codes.
I recommend that you choose to make a website by theme. On this website you can still add discount codes for e-commerce sites.
The advantage of making a themed website is that you can control the commission that the website can generate. Because you will focus on promoting products with high commissions of 200k-300k like Civi .
I don’t like to brag about my income. But today I set a record of nearly 1k for civi network. Hope this also gives you more motivation and confidence in inbound affiliate marketing.

Also make a website with a pure discount code if unfortunately users buy low-value items such as salted fish sauce on e-commerce sites. Then I ask if you earn more than 1 million, it must be quite hard. And running ads, the risk of loss is quite high.
No more lengthy. Let’s embark on creating a website to make money from affiliate marketing.
- What is Affiliate Marketing
- A Beginner’s Guide to Affiliate Marketing
- A Beginner’s Guide to Making Money with Civi
- Make money with AdCombo network: highest commission in the market.
- How to do affiliate marketing is like this
- Instructions to register and earn money with CJ . network
Contents
1. Choose SEO standard domain name
How to choose a domain name I already have a tutorial. You can refer here.
You should buy domain name and hosting from two different providers.
First talking about buying domain names, you should buy at NameCheap . You can refer to the discount code here.
I had a tutorial to buy a domain name at NameCheap. But to make it easier to follow, I will guide you from the beginning.
Step 1 : Go to NameCheap.com and enter the domain name you want to register. Because I made a demo, I chose the .info domain name for cheap. You should choose a .com domain name as I explain in the article on how to choose a domain name.
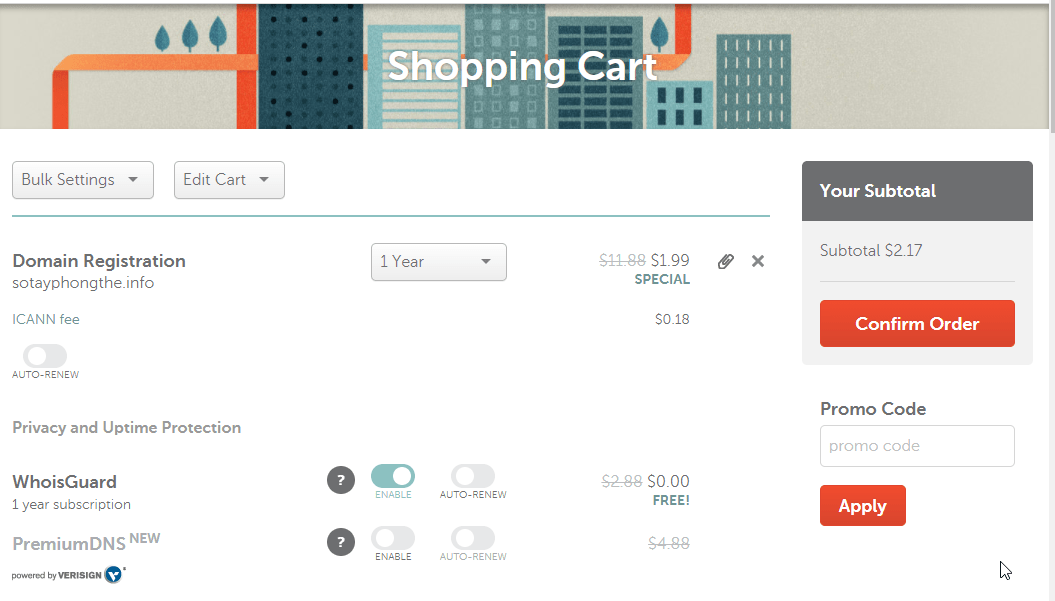
Add domain name to cart. Click the View Cart button.
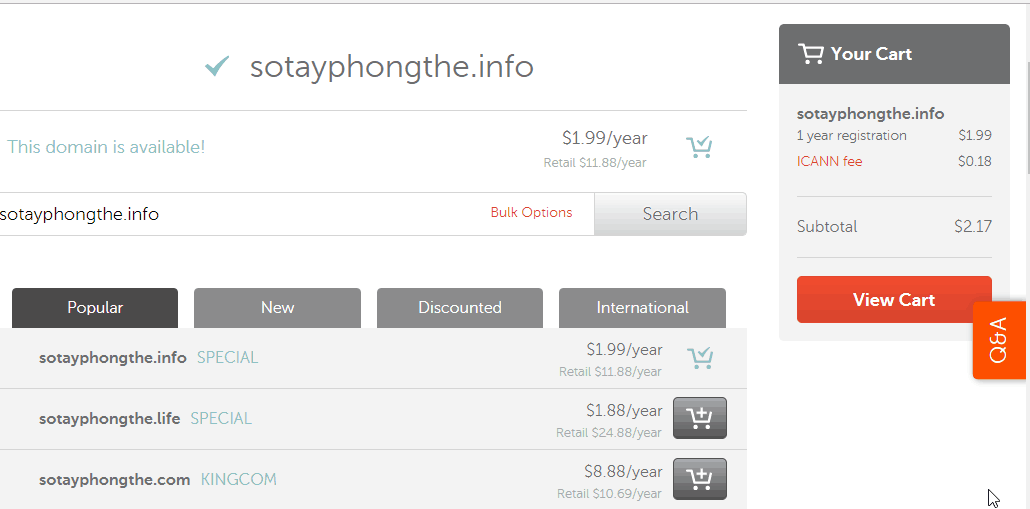
Here, I chose the .info domain name, so I got the maximum discount. No need to enter a discount code anymore. Click the Confirm Order button to continue
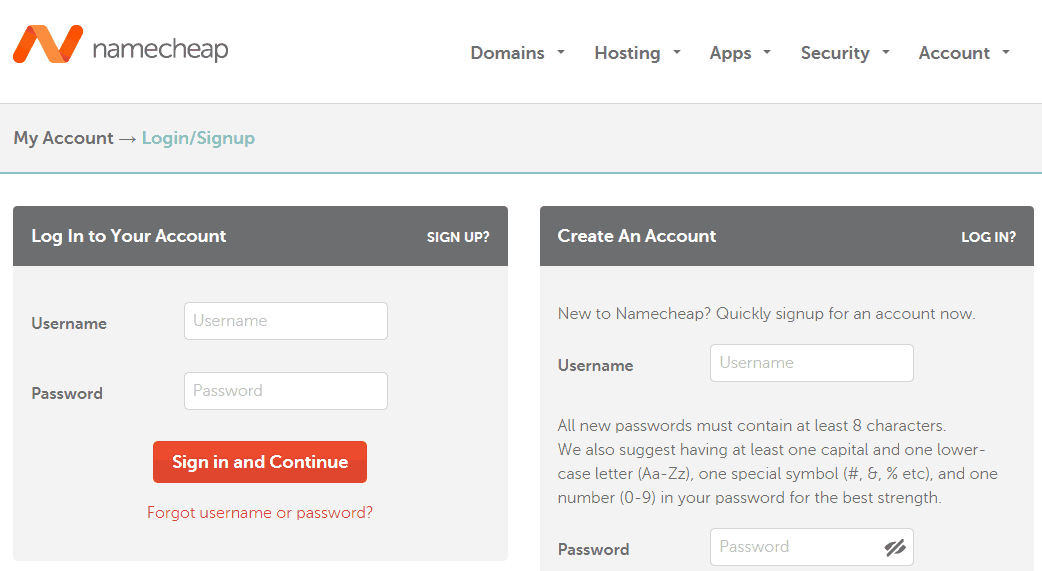
Step 2 : If you do not have an account, select an account. Otherwise, log in with your account.
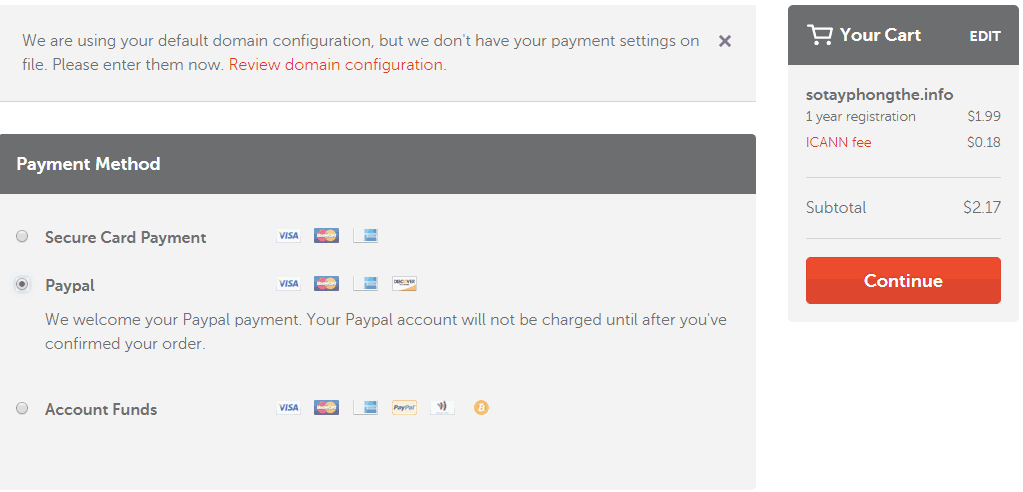
Step 3 : After logging in, you choose PayPal to proceed with the payment.
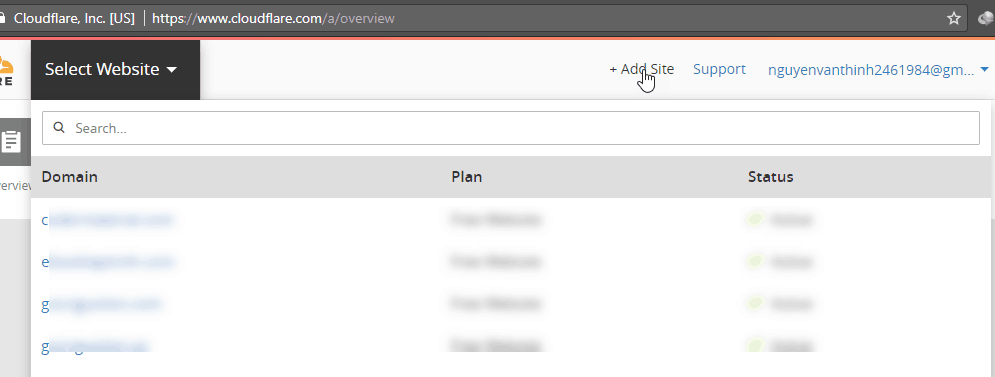
2. Adding a Domain Name to CloudFlare
I recommend using Cloudflare DNS for domain management as explained here .
Go to Cloudflare.com . Create a free account if you don’t have one yet

Click the Add Site link in the upper right corner.
Enter your domain name. Click the Begin Scan button.
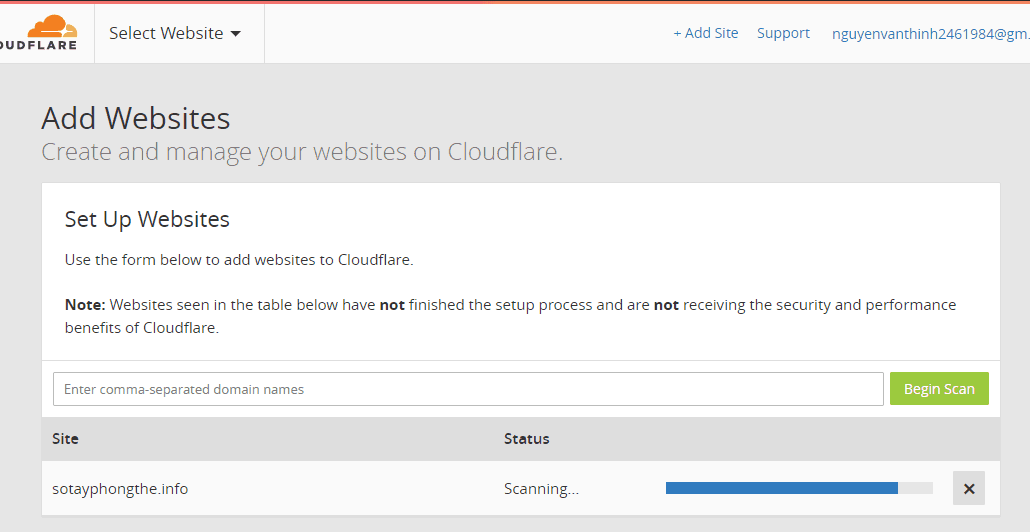
As soon as the scan is complete, click Continue Setup to continue.
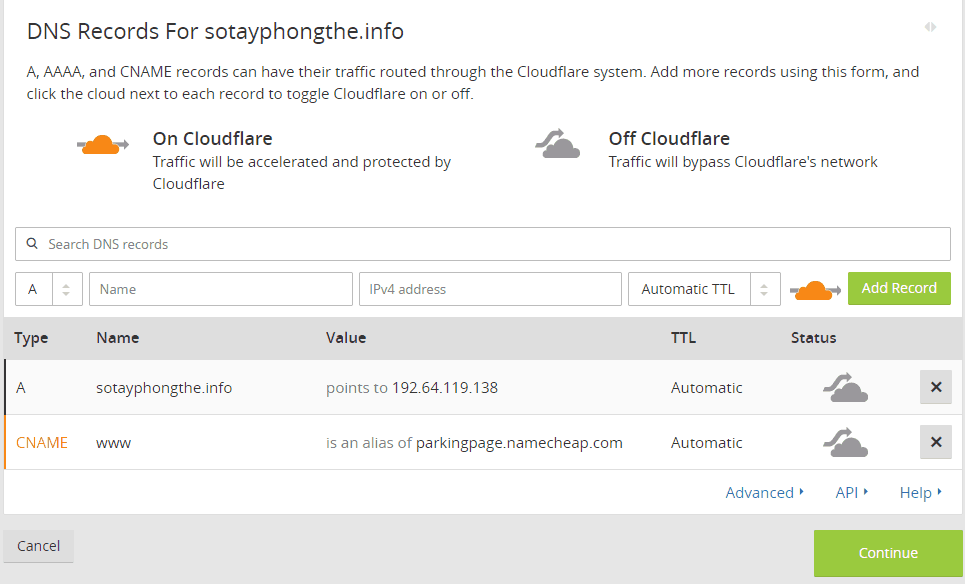
You will see a list of default DNS records of the domain when purchased at NameCheap as below:

You turn yourself off the yellow cloud. Since we will buy hosting with an Asian location, there is no need to use Cloudflare CDN. (Refer to the article How to use Cloudflare DNS )
Second you will delete all records except the first two.
After editing, it looks like this:
Below you convert parkingpage.namecheap.com to your domain name . The picture is a little bit wrong.
Click the Continue button to continue. The next screen you choose Free Website.
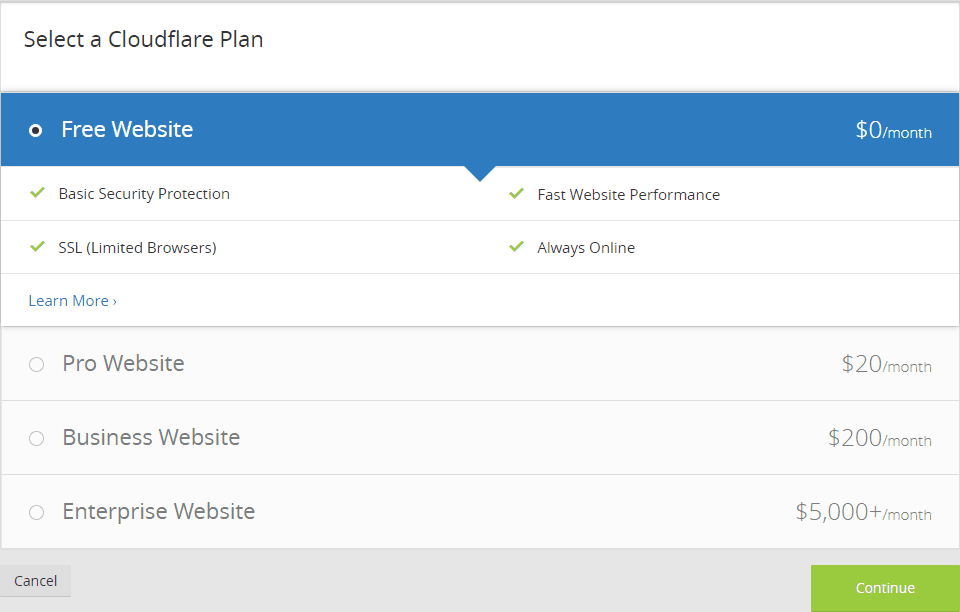
Click the Continue button to continue.
Cloudflare requires you to change the Nameserver on the domain management page to use its value:

Go to the domain management screen in NameCheap. In the NAMESERVERS section, select Custom DNS.

Enter the 2 values that CloudFlare gives you. After pasting the value, click the blue check button.

Do not rush to visit the website right now
3. Buy a quality hosting service
Talking about cheap and quality hosting, it is difficult for any provider to pass HawkHost. (See reviews here .)
Go to HawkHost.com . You will notice a popup offering a 30% discount code. If you don’t see it, you can get the discount code I updated here .
Click on the Get Started button to start buying hosting. Select the 3rd option. Enter the domain name. Click the Use button.

Choose a one-year payment plan. The location you should choose is Hong Kong. This location both gives the best speed to Vietnam and is less affected by cable breaks.

Remove the 25% discount code. Use code 30% off for life or 40% off first bill whichever you prefer.

For example, I use a 30% discount code for life. The price is only $33.52/year . If you sign up for two years, the discount is slightly more.

Click Checkout. Then create an account. Select PayPal to pay.
Usually it will take a while for HawkHost to complete the installation of the hosting service for you. If you see it for a long time, you can open a ticket to urge them to do it quickly.
You will receive an email with something like New Account Information containing your cPanel login information.
4. Point the domain to hosting HawkHost
First, you must find the IP address of the hosting HawkHost you have just installed.
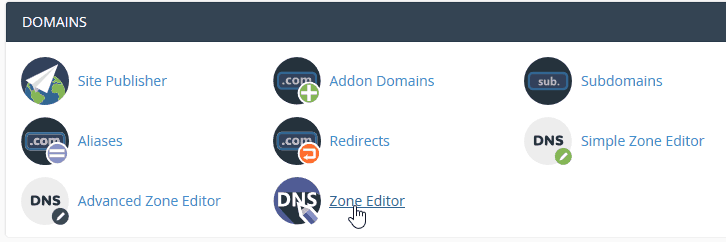
Login to cPanel. Click on Zone Editor
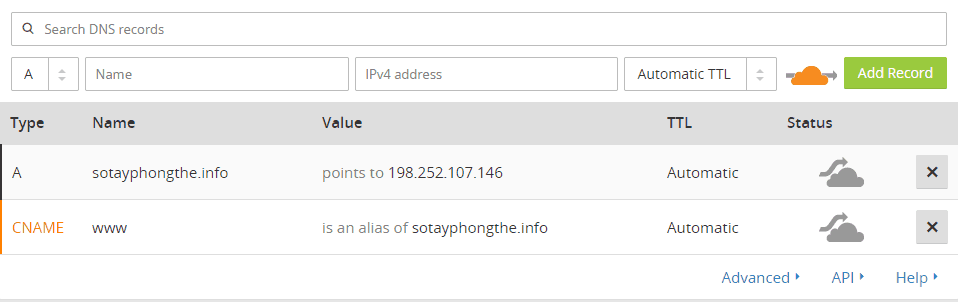
Click the Manage button. On the next screen you will see an IP like this;

Sign in to Cloudflare to edit the A record using this IP address:
At this time, you should not rush to visit the website. Please be patient to finish the last step.
About sending and receiving email by domain name eg xxx@yourdomain.com. You should not use HawkHost’s built-in email service. Instead you use Yandex as the instructions here or Zoho as the instructions here .
5. Install WordPress, Themes and Plugins
Login to HawkHost’s cPanel. We will use Softaculous to install the WordPress website
Click on the WordPress icon.

Click the Install button .

The Software Setup section you choose as below. Note that the In Directory section you leave blank.

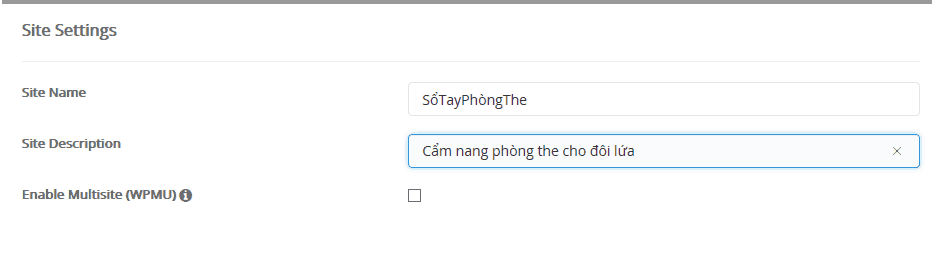
You enter the Site Settings section to suit your website.
In the Admin Account section, you enter the admin account. Select login limit plugin settings. Scroll down and click the Install button.

At this point, you have completed the installation of your WordPress website.

Click on the admin page link to login to the website.
You can now install themes and plugins .
Read more : Essential plugin for WordPress
A few plugins recommend you install:
- Really Simple SSL : HawkHost has automatically installed SSL certificate, you just need to install and activate this plugin.
- LiteSpeed Cache : the best cache plugin for hosting at HawkHost.
- Yoast SEO : SEO plugin for WordPress
- iThemes Security . See more security plugins here.
- Pretty Links : indispensable link shortening plugin for affiliates
Read more : WordPress Affiliate plugin should use
Regarding the WordPress theme for affiliate marketing, I suggest you choose two providers Theme Junkie and Happy Themes .
Test your website speed with the Revenue theme from HappyThemes. Everything is fine


Test results with Pingdom. Note that I have moved HawKhost to the US location because I need to do a foreign market for a main site on this package.
There are several things you need to do after installing WordPress
a. Change language to Vietnamese
Go to Settings -> General and reselect the language to Vietnamese. In addition, adjust Timezone to Vietnam. Click the Save Changes button to save the configuration

b. Update profile
Go to Members -> Your Profile. Update your profile again. By default username will be the display name. This is not very secure. You should change.
Also, you should update your profile picture to look professional.
c. Change static path for standard SEO
You go to Settings -> Paths. Select Post Title. Then save the configuration.

Read more : How to Create SEO Friendly URLs in WordPress
d. Create a sitemap and install Google Analytics
I already have articles on this part. You refer to how to create XML Sitemap and refer to Google Analytics for WordPress settings .
6. Sign up for affiliate marketing networks/programs
Before embarking on participating in affiliate marketing networks/programs, you need to create dozens of quality articles.
There are currently some major marketing networks/programs in Vietnam you should join:
- AccessTrade
- MassOffer
- Civi
- Unica
- Kyna
That is all. And don’t ignore the top affiliate marketing networks that are helping you earn over 1k from MMO.
You have learned how to create a personal website that makes money from A to Z.
If you have any questions, leave them in the comments section below. Don’t forget to share if you find the article useful.


