

Want to learn how to create a landing page in your WordPress website?
But still don’t know where to start? Using which tool?
No problem.
You can easily create a landing page with Elementor .
In today’s post I will show you how to do it.
I will show you how to create a simple landing page from scratch.
Here is the important point:
We will be using only the free plugin version.
If you like freebies, keep reading.
Contents
What is Elementor?

Elementor is a hot tool right now when it comes to designing websites without coding.
It is an intuitive drag-and-drop page builder. That means you can design a complex web page with just drag and drop of already designed elements.
Visual design support tools. You will design your website in the same way that your readers see it.
Elementor works with most WordPress themes. But it’s best to refer to themes that are highly compatible with Elementor here.
You may be interested :
Top 5 WordPress landing page creation plugins
Compare 3 best free WordPress Page Builder plugins
Simple landing page built in this article
In this article, I will create a simple landing page as follows:
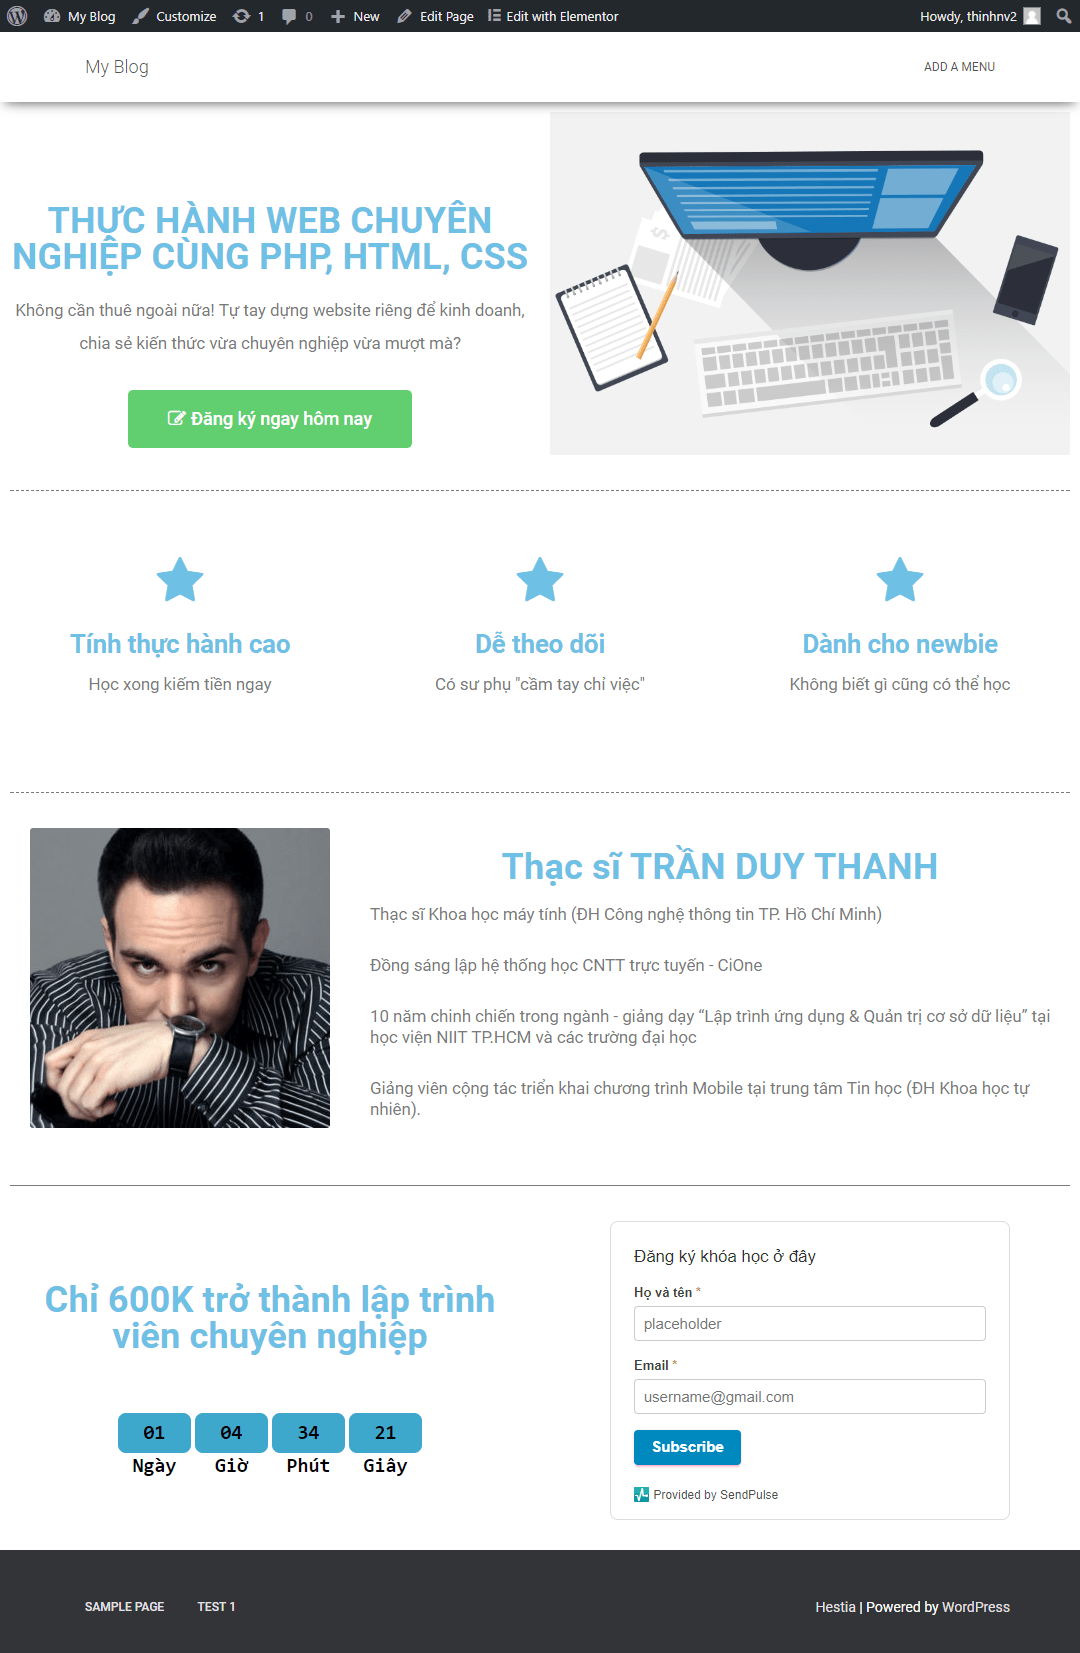
It introduces a course. I’m not a designer, so the landing page looks a bit shabby.
Before instructing you to create such a landing…
… we quickly learn how to use Elementor.
A quick guide on how to use Elementor
First you need to install and activate the free version of the plugin. You can go to the plugin’s homepage to download the zip and upload it to your website.
The simpler way is to find the plugin right in the plugin settings of your website. Then install and activate as usual.
Once the plugin is activated, you create a new page.
In the new page editing interface, you first need to select a template.
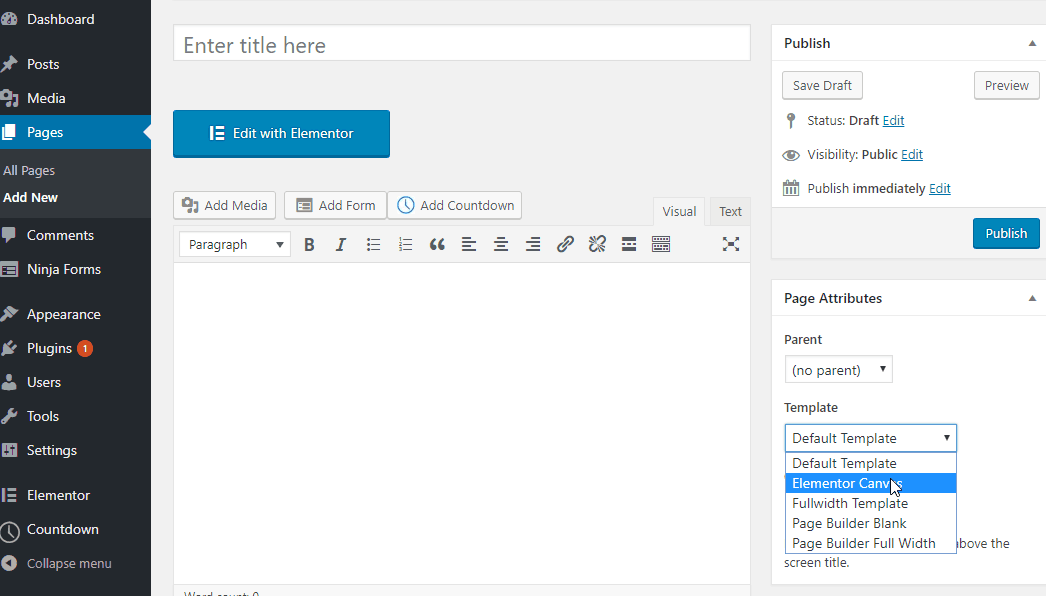
There are 2 options to get you started:
- Full-width template : you will build a full-width landing page, but keep the website header and footer
- Blank canvas : you build a landing page from scratch, a true blank page.
In the landing page I guide in the article, we will choose the full-width template.
Now you choose this style template. Enter a new page name. Click the Save Draft button.
Then click the Edit with Elementor button to open the Elementor design interface.
This is the interface for you to design pages with Elementor.

Minh Hoa
The interface consists of two parts:
- The left sidebar is where you add elements to the right sidebar. It is also where you edit the element you are selecting on the right.
- Visual Preview : is where your design is stored. Its interface is exactly what the end user will see.
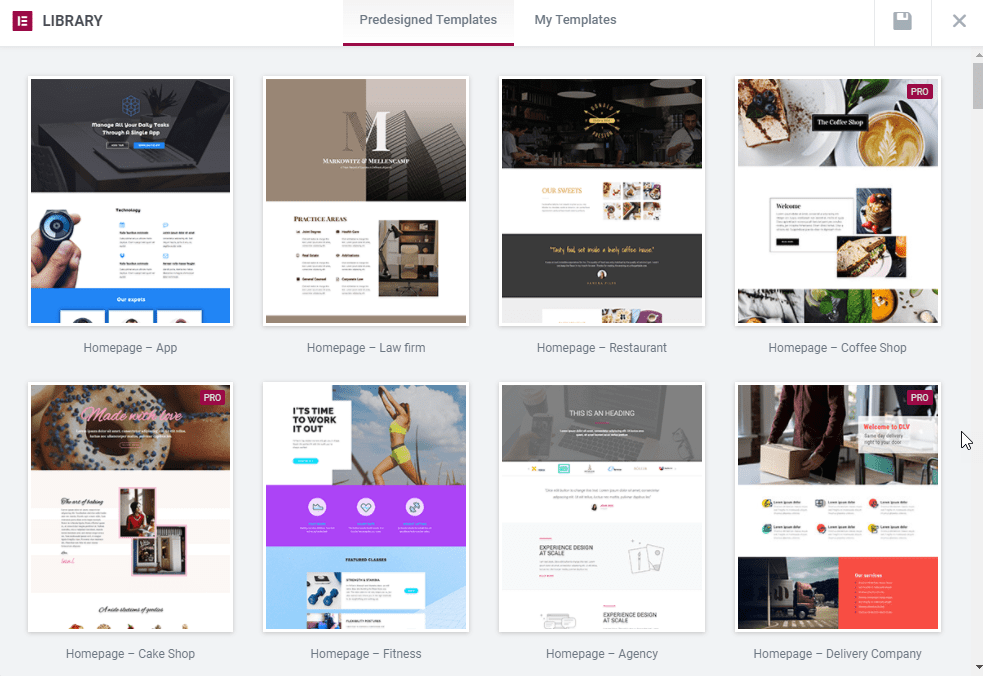
To get started with Elementor, you’ll probably use a built-in template to reduce landing page development time.
Click the Folder button at the bottom of the page and select Template Library.
Besides the templates available only in the Pro version, you will also have many free templates
Basically, to build a landing page with Elementor, you will drag and drop the element you need from the sidebar
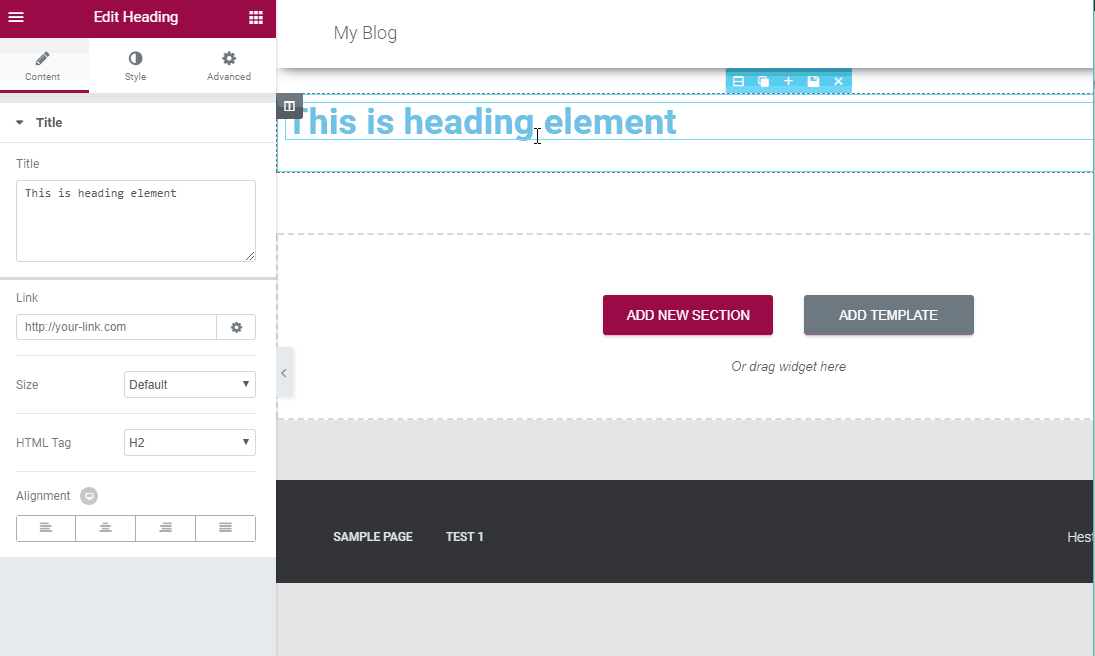
Then you customize the elementor again:
Now the sidebar will have 3 tabs:
- Content : here you will change the content of the element
- Style : where you change the color and typography
- Advanced : where you make advanced changes like margin and padding. Changing the margin and padding helps you to adjust the position of the element.
Ok. Now we will start creating a simple landing page like I introduced above.
Create a simple landing page using Elementor
As you can see our landing page consists of 4 blocks:
Header, features section, author information section, course registration section to collect emails.
First create the header section, you need to click on the Add New Section button

Now you need to choose the column structure. We will choose a two-column structure.

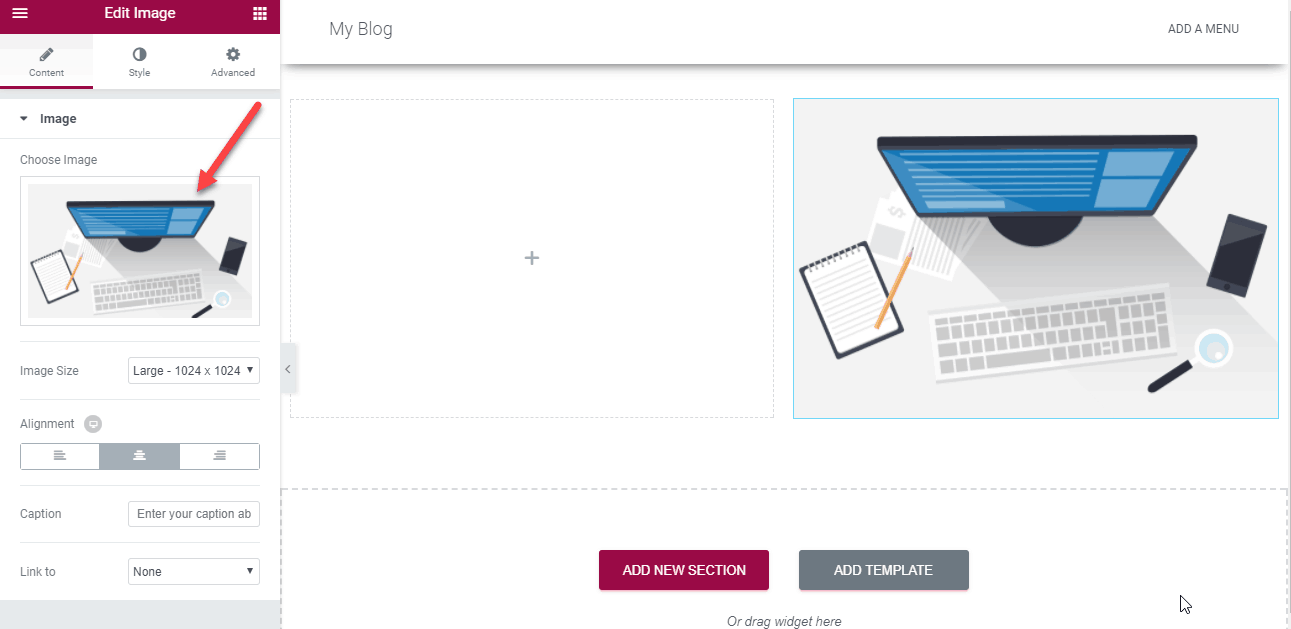
To add an image to the right column, simply drag the Image element :
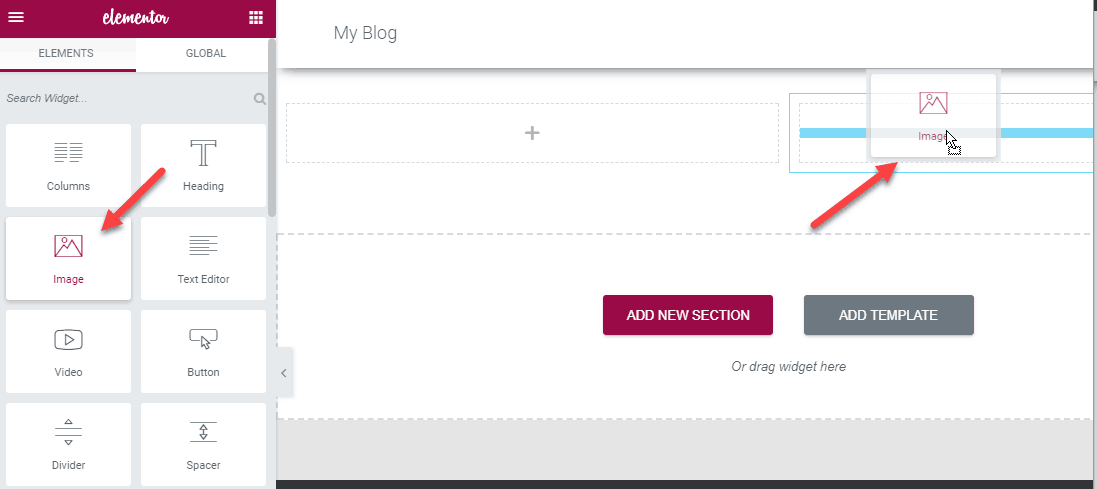
Then on the sidebar click on the image to download and insert the image you want.
In the left column, you drag 3 elements in turn: Heading, Text Editor and Button.

Make changes to the content, position and so on as you like. Remember you change the element position in the Advanced tab by changing the margin and padding.
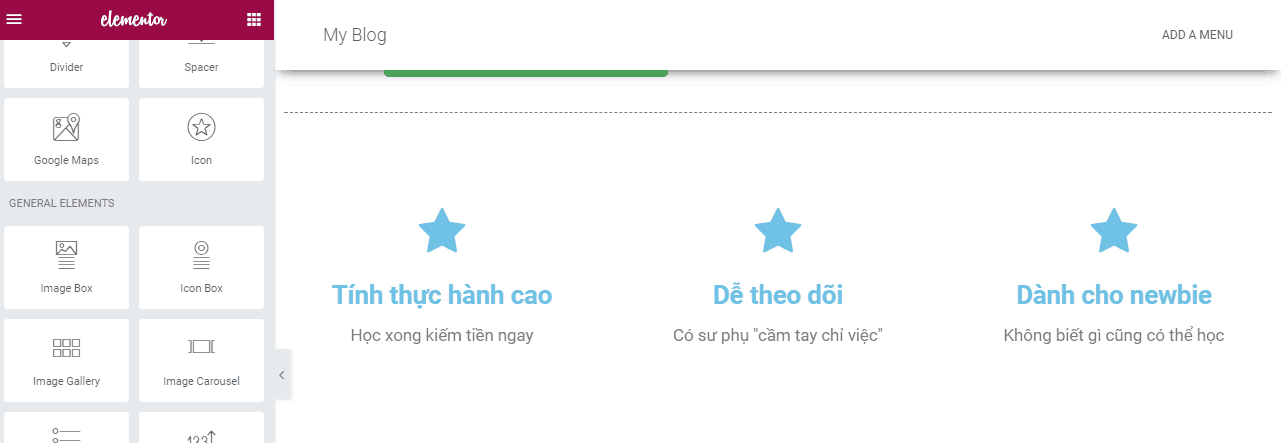
Product features section. You also create the first column structure. Then drag the Icon box element. You can also select the Image box if you want to use custom images instead of icons.
Author information section. Also create a two-column structure. Drag the photo to the left column.
In the right column we use Heading and Text Editor.

Registration section. In the left column we will use counter. The free version does not have this element. You can use the counter plugin.

In the right column you will add the email collection form. Just like on the free version there is no this element.
We will design an email collection form in SendPulse . Then you get the HTML code.

Now you drag the HMTL element and insert the code. In the design interface you will not see the form. But when switching to the front-end view, the form will display as usual.
So I showed you how to create a simple landing page using the free Elementor plugin.
What do you think about the Elementor plugin. Please share your views below.


