

Photos or videos make your writing engaging, engaging, and lively.
So you must be proficient in adding digital files in WordPress.
In today’s article you will learn the following techniques:
- Insert images into WordPress content
- Create and insert Gallery Image
- Insert video into content in WordPress
Contents
Insert images into WordPress content
In the Post and Page editor pane, you may notice the Add Media button. You use this button to insert digital file types (images, videos, music) into the content.
You can upload images from your computer and insert them into your content. Or you can insert an image from an external link
Upload and insert photos:

Click Add Media to insert photos
From the Post editor screen, click where you want to insert the image.
Click Add Media

The Media Uploader window opens. You click the Select File button to select an image from your computer or drag the image directly into the upload area.

Photo uploaded successfully
When the image is successfully uploaded, you will see the image with a check mark in the right corner.
On the right side of the screen is information related to the photo.
Title : The default image title is the file name. From an SEO perspective, you should name photos that contain keywords and are descriptive. So when uploading an image you do not need to change the title.
Alt Text: The alt text, you enter description information. You should not leave this section blank. In addition, you can put the article keywords here. Thus, the SEO value of the article in the search results will be better. Because Google is just a machine. It can’t see to understand your photo content right? But the alt tag will help with this.
Caption : this information will be displayed below the photo. Caption is the description of the image. Good photo description is also a factor that attracts readers. .
Some information below:
Alignment : Aligns the image relative to the surrounding text
Link To : You choose the action when the user clicks on the image. Leave none the image will not be clickable. Media File will take the reader to the original image file. Or a url you want to take the user to when clicking on the image.
Size : you choose the size of the image to be inserted into the content
Click Insert into Post to insert an image
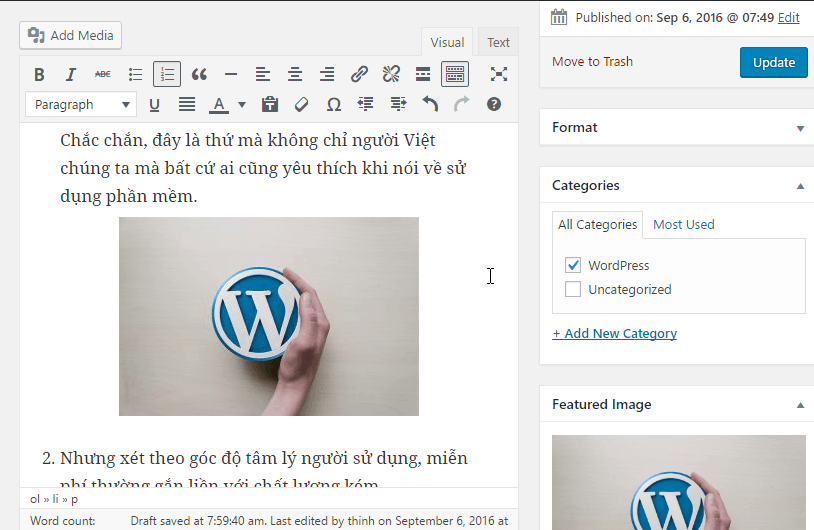
Post has pictures inserted
Remember to click Update to update the changes.
Working with images in the editor
After inserting an image into a Post or Page, you can easily edit it accordingly.
Click on the newly inserted image, you will see the menu appear on the image.
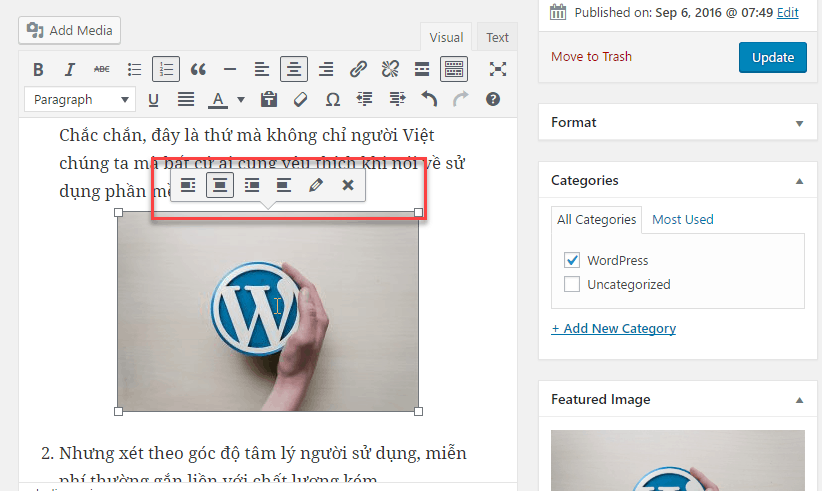
Photo editing menu
You can change the image alignment. If you want to edit more click on the button with the pencil shape. The Image Details window appears
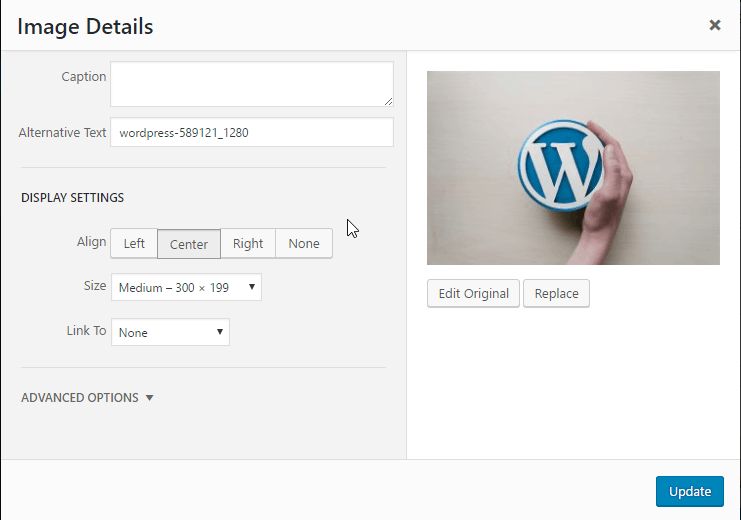
Image detail window
How to store images in WordPress
After you upload an image, the image will be saved in the /wp-content/uploads folder. You will see folders organized by the date you uploaded the image. \
In the image below, you will see that WordPress will crop the uploaded image to various sizes.

Edit photos in WordPress
Before uploading an image to WordPress, you should edit the image for optimal use using software on your computer such as IrfanView.
However, inside WordPress there is also a simple image editor. You can access the image editor by clicking the Edit Image or Edit Orginial button. These buttons you can see in many places:
Media Uploader window (when you click the Add Media button in the content editor screen and select an image)

Image Details (when selecting an image to be inserted in the content and clicking the pencil button)
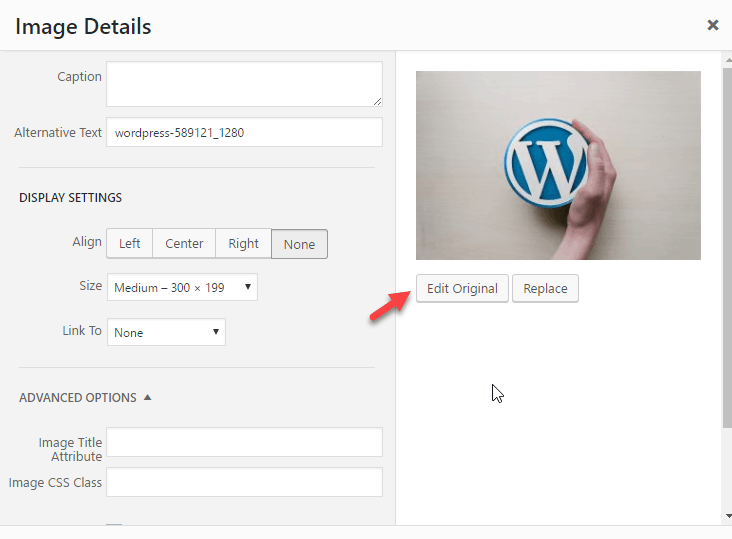
Attach Details: Go to Media -> Library, and select an image.

Here is the image editing screen in WordPress:
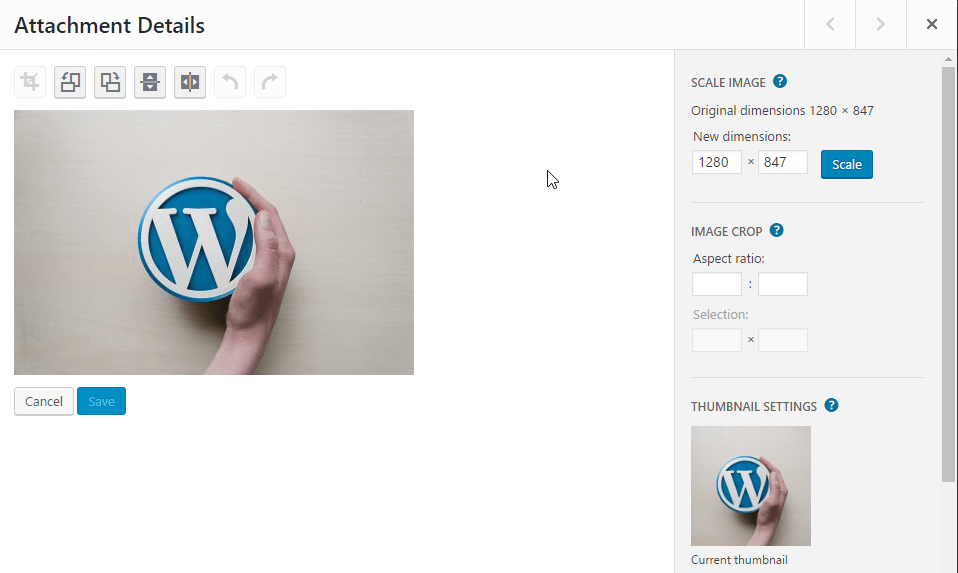
On this screen you can crop the image (crop), rotate the image (rotate), flip the image (Flip) To crop the image you just need to click the image and drag to create the area to be cropped.
How to create and insert a simple gallery
Gallery is a format for displaying multiple images at once. Can display in grid style (grid) or slideshow (slide) depending on the theme.
Steps to create and insert gallery
In the content editing screen, click Add Media. Then click Create Gallery
Then you select the photos from the Media Library and press the Create a New Gallery button

You switch to the Edit Gallery screen. Here are the details of the screen

Link To : The type of link that leads to when clicking on each image. You should choose Media File to go to the original image file.
Columns : the number of columns to display.
Random Order : Displayed in random order after each page load.
Size : The size of the image will be displayed, so choose a beautiful thumbnail.
Click the Insert Gallery button to see the final result
Insert Video into content
WordPress also supports inserting videos into content. You have 2 options. First upload the video and insert it into the content. This way is not recommended. Because this causes heavy host and bandwidth consumption.
The second way, you upload the video to online sharing services like Vimeo, Youtube and so on. Then you get the URL and copy it into the content.
WordPress has a feature called oEmbed. The feature will automatically recognize the link to the video inserted into the post. WordPress will convert the link into an embed code. Simply put, you just need to copy the link of the video into the content. WordPress will automatically display.
You can test it by copying the link of a YouTube video and inserting it into the content.
This part is relatively simple, so I did not take pictures.
Epilogue
Thus, you have learned the basic techniques in adding digital files in WordPress.
If you have any problems, leave a comment below.


