

WordPress is the most popular website building platform today. One of the reasons for its popularity is that the process of installing and operating a WordPress website is quite simple.
In fact, setting up a WordPress website is very easy, even for beginners without much technical knowledge. You only need to focus a few minutes to have a WordPress website.
In today’s article, I will guide you step by step through the process of installing WordPress on the host. My guide covers the installation process using the installation script in cPanel and manual installation. That way you get flexibility in setting up your WordPress website.
Read more : A Beginner’s Guide to Using cPanel .
Contents
Some things you need to have before installing WordPress
Read more : How to install WordPress using Poopy.life
Before installing you need to have a domain name (domain name) and register a hosting service from a hosting provider. These are the 2 things you must have if you want to install a WordPress website.
About domain name, if you do not need a .vn domain name, you should choose an international domain name provider. Because of their service quality, they are often better than domestic suppliers. For example, if you want to transfer the domain name later, it is also easier.
Here are a few reputable international domain name registrars that I recommend:
1. GoDaddy : the largest domain registrar in the world. You can update your GoDaddy discount code here . Or see instructions for registering a domain name at GoDaddy .
2. Namecheap : another reputable international domain name provider. Namecheap usually has a $0.88 domain name program . Buy a domain name here and you will get the first year of the domain information hiding service for free . I also have detailed instructions on how to register a domain at Namecheap .
3. Namesilo : Namesilo is one of the domain name registrars with very low domain maintenance cost (about 9$/year). Besides, Namesilo is free to hide personal information when buying a domain name for life.
Regarding hosting, I recommend you to use the hosting services of the providers that I mentioned in this article .
Install WordPress using Softaculous
Softaculous is a script that automatically installs the latest version of WordPress. Most hosting services provide this self-installing application. So the installation instructions below you can apply to any hosting provider that supports Softaculous in cPanel. This is the fastest way to set up a WordPress website today.
Below, I use A2Hosting ‘s cPanel as an example. As for A2Hosting, the company can further customize the website after installation by pre-installing some security plugins. This comes in handy for some of you who are new to WordPress.
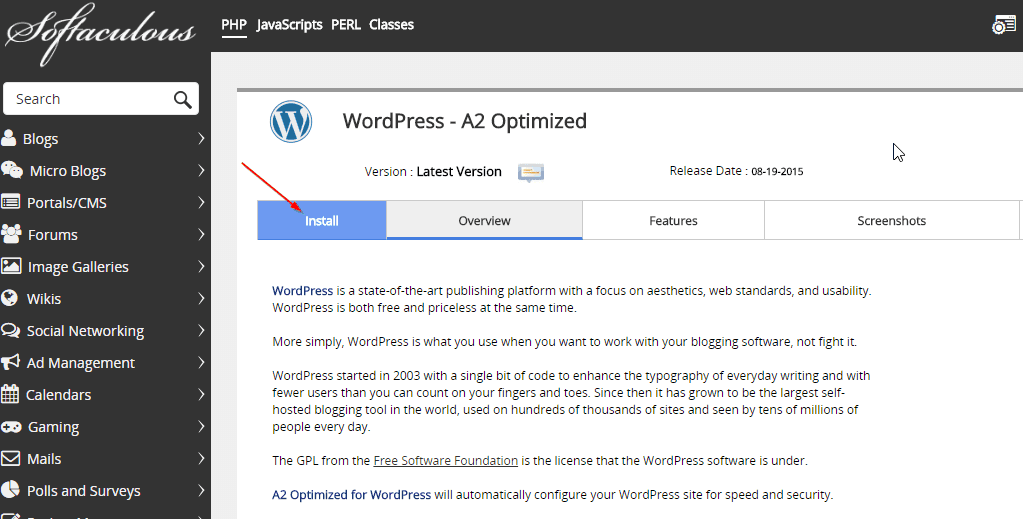
Now you login to cPanel. In my case, the auto-installer app was named “ WordPress – A2 Optimized ”. If you use a different hosting service, it may have a different name such as WordPress.

Click on the WordPress logo as shown in the image.
On the next screen, you will see the WordPress overview screen. Click on the tab called “ Install ” to switch to the installation interface:
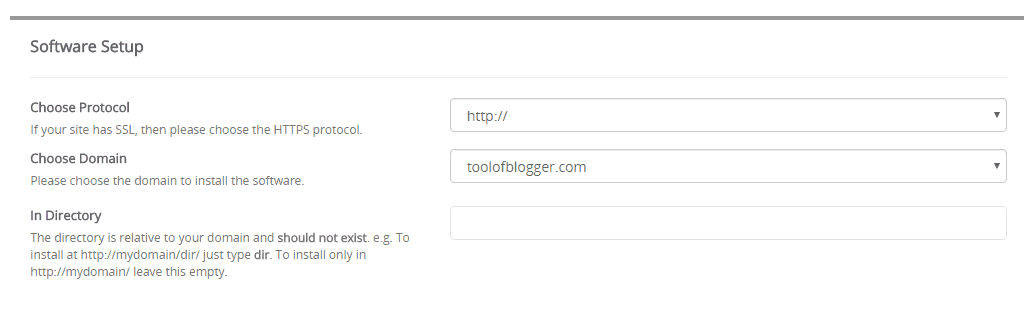
In the ” Software Setup ” section, you will enter the protocol information, the domain name and the directory where you intend to install the website. In the protocol section, if you do not use the https protocol, leave the default as http://. Don’t choose www as this makes the URL unnecessarily verbose. The domain name you enter in the domain name you have registered. As for the installation directory, leave it blank because we install the website in the root directory.
Scroll down to enter the basic information for your blog. Specifically, you will enter information: blog name, blog description. After installation you can completely change this information. So don’t bother to find a good name or description.

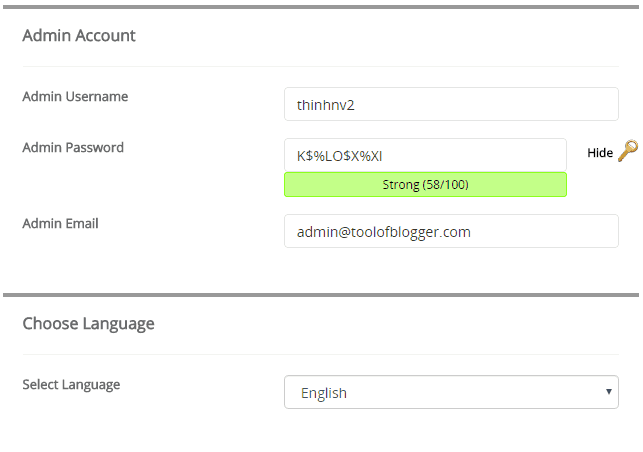
Below, you enter the admin account information. As for the admin account, Softaculous has already filled in the information for you. You can change the username and email address section accordingly. For the password section, you should use a self-generated password. Because this password is very strong. Make sure you copy the password to a secret place.
In the Advanced section, you should change the database name to something meaningful. Thus, if you have multiple websites installed on the same hosting, you will also distinguish which website’s database. This helps to avoid deleting the wrong database.
In the email field you enter the active email address. Because when the installation is complete, Softaculous will send all installation information to email.

Now you click the install button. You will see a status bar indicating the installation process. The installation process will take a few minutes. Don’t close the window until the status bar reaches 100%. If you do, it may affect the installation process.

After successful installation, you will see a screen like below. On this screen you will see 2 links. A link to your blog home page. The link is also your admin page. If you are using hosting at A2Hosting, you should note that the admin page path has changed from the default. As I said, A2Hosting has pre-installed a number of plugins for WordPress, including a plugin that changes the default WordPress login page path.

At this point, we have completed the WordPress installation process using Softaculous’s installation script.
Note : Immediately after successful installation, click on the Overview tab in Softaculous’s interface. You will see the newly installed website. You can remove and reinstall if you encounter an error.

In the next part, I will guide you to install WordPress manually.
Install WordPress using File Manager
Compared to the automatic installation process above, manual installation via File Manager is a bit more complicated. However, it doesn’t take you too long.
Besides, mastering the manual WordPress installation process also helps you to improve your WordPress administration skills.
In this part, I will use a tool called File Manager. File Manager is a file manager available in cPanel. It is like Windows Explorer in Windows operating system.
Note : This way you can use FTP, but I find the process of pushing files via FTP to the server is usually not as fast as File Manager.
Read more : FTP User Guide for Beginners .
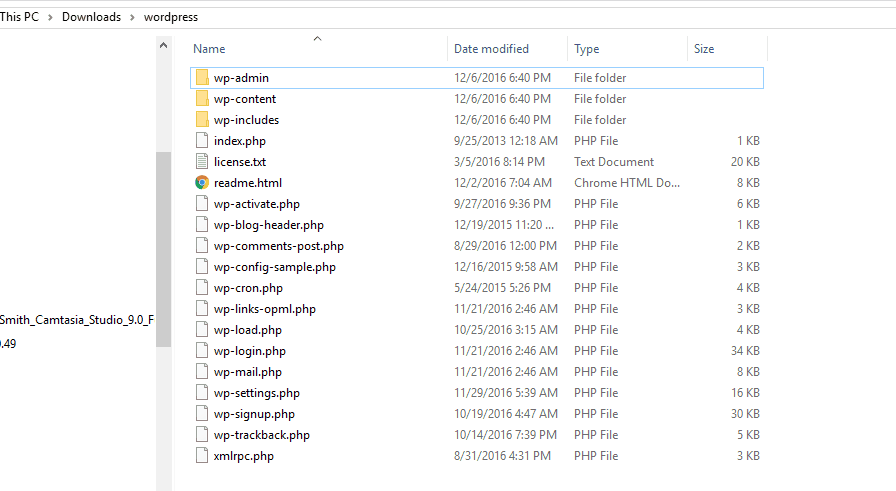
First you download the latest version of WordPress . Because the WordPress archive contains a subdirectory called wordpress, you should extract it. Next, you select all the files in the folder and compress them. You will now have a compressed file containing the WordPress source code directly inside. Doing so when uploading the compressed file to the host, you just need to decompress it.
Now, you login to cPanel. Move to the Files section. Click FileManager.

Navigate to the public_html folder. This is the directory that will contain all the files of the website. If you install the website as an add-on, you navigate to the corresponding directory.
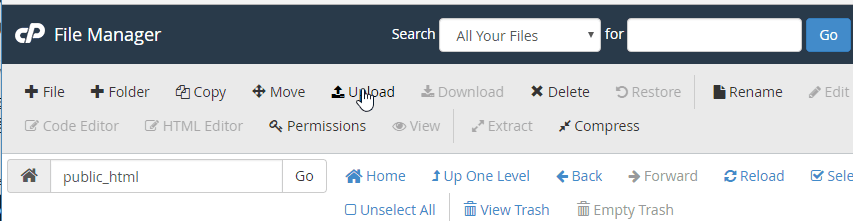
You click Upload.
On the next screen, drag the zip file to the upload area to start the upload process.

Now return to the File Manager interface. Select the zip file and extract it.
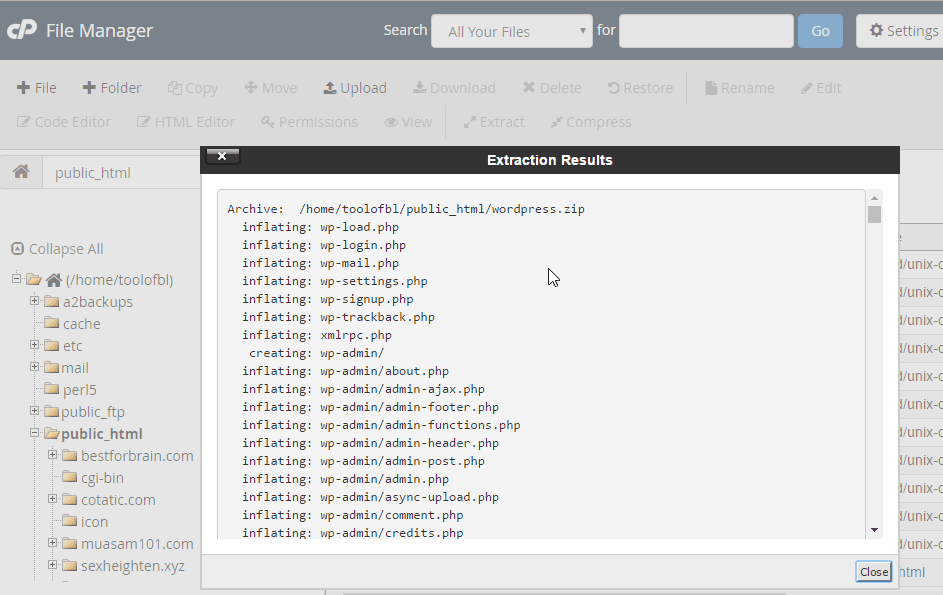
Once done, you should delete the wordpress zip file to reduce the size of the host.
At this point, we have completed the process of pushing all WordPress files to the server.
The next step, we create the database (database) for the blog.
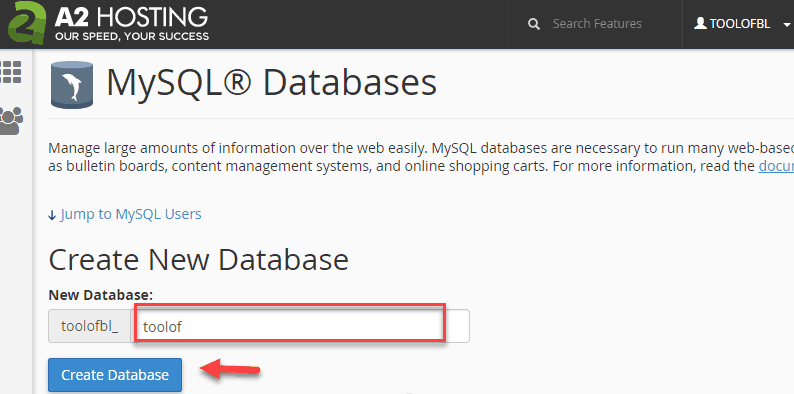
To create a database, open cPanel and navigate to the Databases section. Click on MySQL Databases:

On the next screen, enter the name of the database you want to create. And click on the Create Database button :
You now have the database. Click Go Back to return to the MySQL Databases interface.

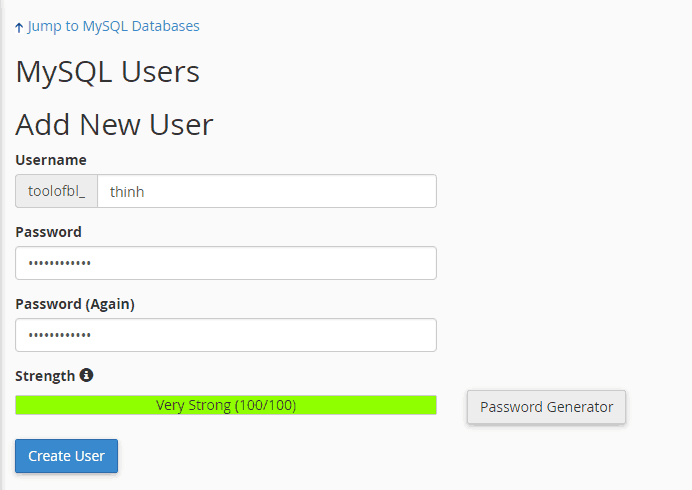
The next step is to create an account to access the database. Also on the interface to create a database, you scroll down to the MySQL Users section .
Here, you enter your username and password, then click the Create a Use r button : Make sure you copy the password again. Because we will use username and password in the step below.
In order for the account you just created to access the database, you need to assign the account to the database. Scroll to the Add a User to a Database section to complete this task.

When assigning an account to the database you will be asked for the account’s permissions, you choose all permissions.

Now the database is ready. We move on to the actual WordPress installation.
Open a browser and enter your website address, for example www.yoursite.com .
The first screen you see is the language selection page. You can choose Vietnamese language now:

Click the Continue button, you will see the installation instructions. All the information needed for the installation process we already have in the step above. So you click the button Do now to continue the installation process:

On the next screen, you will see an information entry form. You enter the information we had in the step above.
Fill in the information in the form then click the Submit button .

Next you click the Execute Settings button . At this point, WordPress will create the table in the database. Once done, you will move on to the next step of the installation process.
In this step, you enter some information as follows: page title, username, email address. The other parts are left as they are. Remember to copy the password to log in later. Finally, click on the Install WordPress button .

You will see a successful installation screen. You can now login to the WordPress admin area.

Take a few more steps to optimize WordPress
Once installed, you should tweak the WordPress version we just installed to work better.
First, adjust the time zone and time format to match the Vietnamese location. You go to Settings->General , then scroll down and edit as below. Next click on the Save Changes button to save.

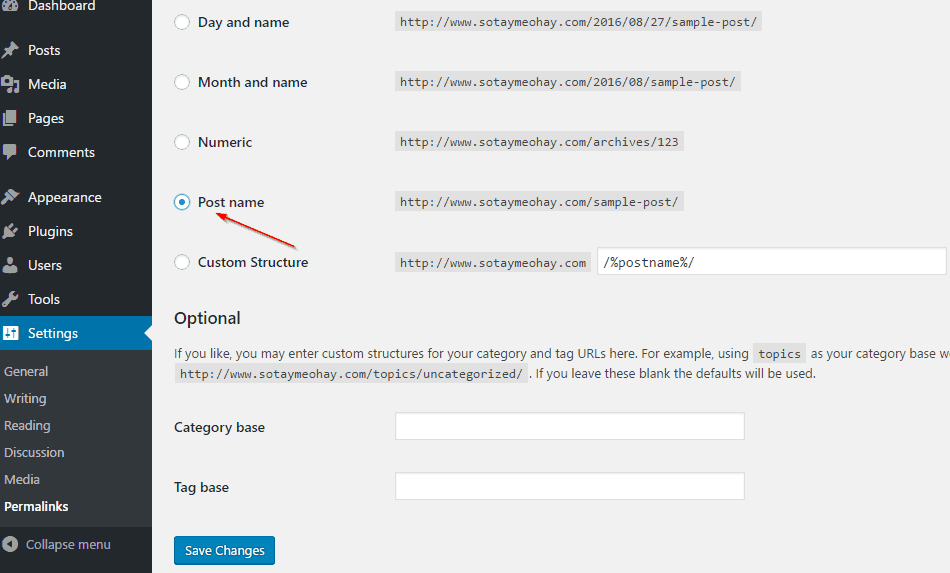
Continue to switch to Permalinks ( Settings-> Permalinks ), and change as below:
Read more : List of Essential Plugins for WordPress
Epilogue
Thus, I have guided you to install WordPress with 2 methods: automatically via Softaculous and manually. Manual method is only used when cPanel software does not have Softaculous.
The installation process presents many steps but is actually very simple.
If you found this article helpful, don’t forget to share it on social media.
Let me know of any difficulties you encountered during the WordPress installation in the comments section below.


