

Today I will show you how to use Menus in WordPress. Specifically, you will learn the following cool things in today’s article:
- Understand a few concepts around the topic of Menu
- Know how to create and display Menus
- Know how to use Custom Menu Widget
- Know how to use Font Awesome Icon library to make menu more attractive
Now let’s get acquainted with the Menu in WordPress.

Contents
Understanding Menus and Menu Location
A menu is a group of links that lead to various elements of a WordPress website. You can choose many elements to include in the menu such as Page, Category, Tag, Post and so on.
Menu Location is the designated area in a theme where you can place a menu you create.
The number of menu positions and where to display the menu depends on the theme. For example , this blog’s Beginner theme has 2 Menu locations. The Primary Menu includes links such as links to pages such as Copyright, Contact. The Secondary Menu includes links such as links to the WordPress site. You will also notice in the WordPress section there are sublinks like WordPress Tutorials or WordPress Plugins. This is the type of parent-child menu that is popular today.
Custom Menu Widget
Theme decides Menu position. But on any WordPress site, you can place a menu in any available Widget area by using Custom Menu Widget. A common example is a menu containing all the Categories in the Sidebar.
Create and display Menus
To create a Menu, go to Appearance -> Menus in Dashboard:
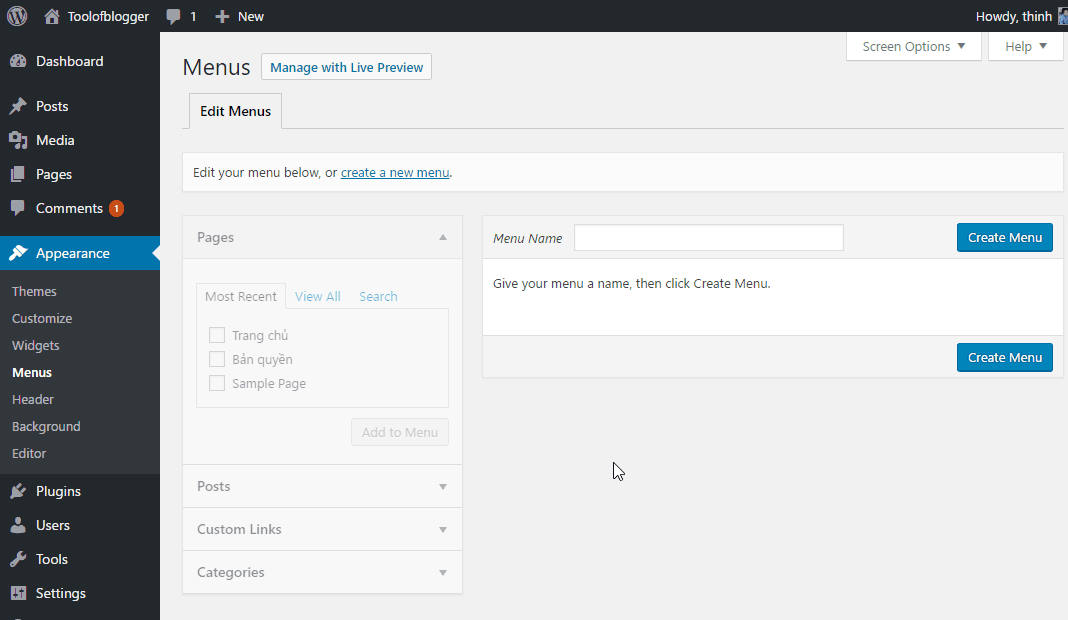
Menu Management Screen in WordPress
When you don’t have any Menu yet, the left column of the management screen is greyed out. As soon as you create the Menu it will be active.
Now enter the Menu name and press Create Menu . The Menu name will not be displayed on the homepage. It just helps you to remember the Menu purpose in the Menu management.
Enter a Menu name to create a Menu
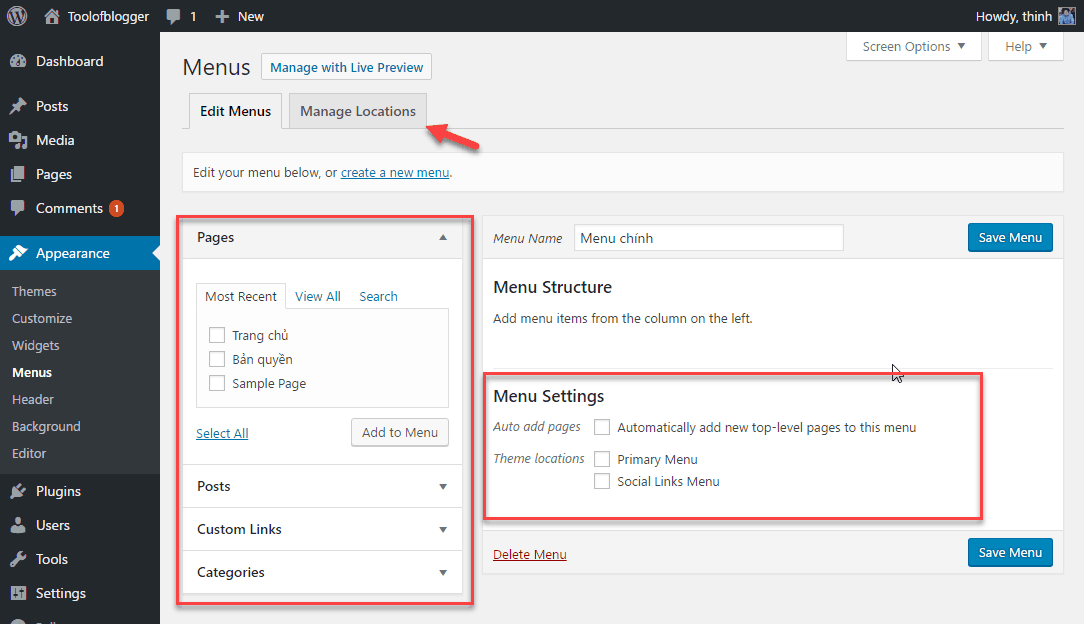
After creating the Menu, you see the Setting Menu and the Location Menu appear. The left column is also active for you to add items to the menu.
Now we add a link to a page as a menu item. In the page box, select the Page you want in the Menu. Then you click Add To Menu . In the image below, I have added a Page named Copyright to the menu.

Add Link to Page as a Menu item
You also have an extra link with the Links option:

Use Custom Links
You can drag and drop the Menu elements accordingly.

Rearrange Menu Items
You can have a Submenu item by dragging the indent menu item onto the menu item you want to become the parent link:

How to create a parent and child menu
After you have the menu you want, you will choose Menu Location for the menu. You can choose from the Settings Menu or from the Menu Location tab :

Assign a position to the menu
Press Save Menu to save all settings. Now we go to the homepage to check the results:

Menu displayed on home page
A few tricks with the Menu:
1. Change the display name of a Menu item
Usually the name of the Page or Post can be very long. When you put them on the menu, you can change the name to keep it short to match the Menu.
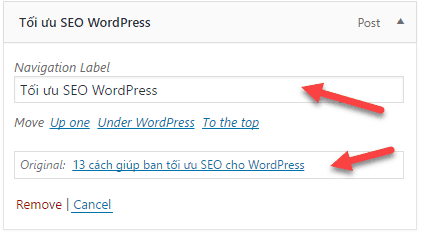
As you can see below you still have the original name information. So you know which post the menu item is pointing to.
2. Add advanced editing features:
In the Screen Options section, you can choose some advanced editing features in Show advanced menu properties . Example Link Target helps you configure opening in new tab for a menu item

Create Custom Menu Widgets
You create a menu like the step above. But you don’t assign a position to the menu. Because you will show Menu using Widget.
You go to Appearance -> Widgets , then click Custom Menu . Then click Add Widget to add the Widget to the display area on the Sidebar. The number of widget display areas depends on the theme. With this default theme, you only have one widget area.

Create Custom Menus in WordPress
Type a title for the Menu and select the Menu to display. Click Save to save the settings

Enter a name and select the Menu to display
After clicking Save, remember to check the homepage to see if it displays OK.
Using Font Awesome Icons
Have you noticed that each of your Menu items has an accompanying icon. Add icons to make the menu more vivid and eye-catching.
Currently I am using Font Awesome Icon to add icons for each menu item. Here I show you how to use Font Awesome.
First of all you need to install Font Awesome Icon. The installation process is very simple. You go to Appearance -> Editor , select the file header.php . Next paste the following line of code in the header as shown below
Install Font Awesome Icon
You go to the Font Awesome Icon homepage to choose the icon you want. In this example, I select the Home icon and copy the code as below:
Copy this code of Icon Home
Then, you go to the Menu management screen, paste the code you copied before as shown below:
Copy the code of Icon Home into Navigational Label
Finally, go to the homepage to check the results
Icon displayed on home page
Just a few simple steps and you have an icon next to each menu item.
Epilogue
With this article, you will surely master using menus in WordPress.
Remember that the theme has a lot to do with the display and placement of the Menu.
If you have any difficulty with menus in WordPress, leave a comment below.
If you love this blog, subscribe to always be notified when I have a new post.


