

This is the last post in my series of manual LEMP installation articles.
Today’s article I will show you how to install a free Let’s Encrypt SSL certificate for your website.
Let’s start together.
Contents
Step 1: Install Cerbot Let’s Encrypt Client
I choose Certbot client because it makes installing Let’s Encrypt easy.
First you need to install the EPEL repository:
yum install epel-releaseNow install certbot-nginx with the following command:
yum install certbot-nginxStep 2: Perform www redirect to no www with NGINX
In this case, I will redirect from www to non-www.
When adding the domain we already have an nginx configuration file for example: /etc/nginx/domains/khamphaso.com.conf.
Create an additional nginx configuration file for the domain (replace your domain name with yours):
nano /etc/nginx/domains/khamphaso.com.redirect.confCopy and paste this code in:
server {

server_name www.example.com;

return 301 $scheme://example.com$request_uri;

}
Save and exit nano.
Restart nginx: systemctl restart nginx
Step 3: Get the certificate
Get the certificate and install for the domain you want:
certbot --nginx -d example.com -d www.example.comIf you run it for the first time it will ask for your email address. It then asks you whether you want to receive the email or not.
Finally it asks how to configure HTTPS you choose 2 for safety.
Now your website has successfully installed the Let’s Encrypt certificate.
Let’s Encrypt certificates are only valid for 90 days. So you need to create auto-renew cronjob:
export VISUAL=nano; crontab -eAdd this line:
15 3 * * * /usr/bin/certbot renew --quietMeaning: Run the renewal order at 3:15 am. If the certificate has not expired it does nothing.
Step 4: Update Diffe-Hellman parameters
If you test your website now with the SSL Labs Server Test you will only get a B.
To resolve this issue, run the following command:
openssl dhparam -out /etc/ssl/certs/dhparam.pem 2048After success, open the nginx configuration file:
nano /etc/nginx/domains/khamphaso.com.confPaste the following line into the server block:
ssl_dhparam /etc/ssl/certs/dhparam.pem;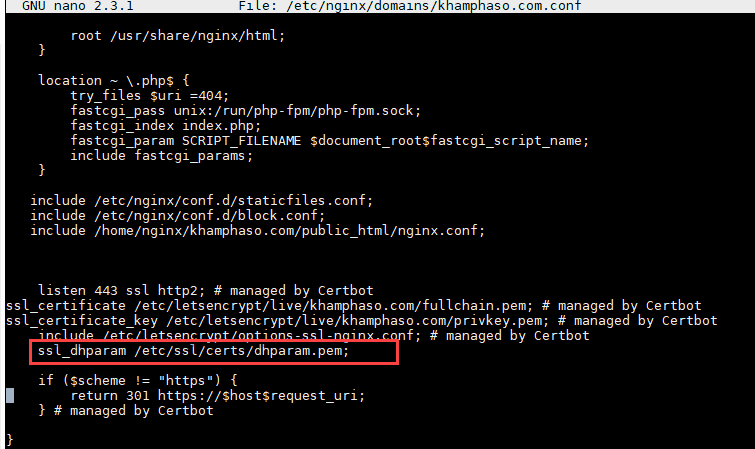
By default, the CertBot configuration section does not configure http2 you edit:
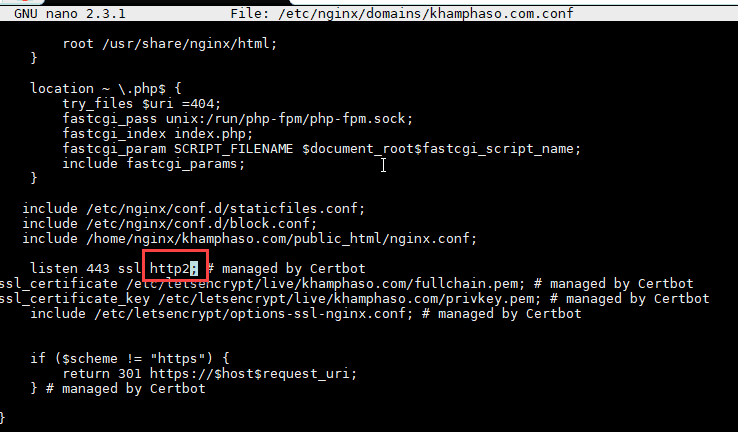
Step 5: Enable HTTP/2 for NGINX on CentOS
Currently NGINX is having the following issue:
It is compiled with OpenSSL from 1.0.2 and earlier. Therefore, popular browsers still use the old protocol HTTP/1.1. You can see the details of the problem in this article .
You can check in more detail the command: nginx -V. will see the OpenSSL version.
The only workaround now is to recompile the source with the new Open SSL version. Only then will your website run through the HTTP/2 protocol.
How to do this, you can see in this article . (from paragraph 14 onwards you don’t need to because we already have nginx installed).
So in this article you have installed the Let’s Encrypt certificate on CentOS for NGINX.
In general, CentOS currently has an old OpenSSL version that causes HTTP/2 problems.


