

Surely you are afraid to backup manually .
Simply, it is a solution that consumes a lot of time and effort.
Jokingly, this is the farmer’s way of doing things.
Of course, we will use the backup plugin to automatically backup WordPress.
When I was new to WordPress, I used BackWPUp a lot. But personally, I find BackWPUp very prone to miscellaneous errors.
After switching to UpdraftPlus , the backup went very smoothly.
So I want to show you how to backup and restore with this plugin.
First, let’s learn a little about UpdraftPlus
Introducing the UpdraftPlus plugin
This is a plugin that helps you to backup and restore your website easily. You can backup manually or automatically according to the plan. Backups can be stored on popular cloud storage services like Amazon S3, Dropbox, Google Drive and so on.
The plugin includes free and paid versions. The free version is enough for basic backup and backup needs. But if you want more features you can buy the premium version.
Some features:
- Supports WordPress site backup to Updraft Vault (Updraft’s hosting service), Amazone S3, Dropbox, Rackspace Cloud Files, Google Drive, Google Cloud Storage, DreamHost DreamObjects, FTP, OpenStack and email.
- Fast recovery (both source files and databases).
- Scheduled automatic backups
- Features site duplicator/migrator: can copy web pages and move to new storage location.
- Can restore and convert backup files of other backup plugins. Currently supported: BackWPUp, BackUp WordPress, Simple Backup, WordPress backup To Dropbox.
- You can plan your own source code and database backups.
- Upload failure can be automatically resumed.
- Large pages can be split into file archives.
- Select backup files (plugins, themes, content)
- Select components of the backup to restore
- Download backup files directly from WordPress Dashboard
- Backup Database can be encrypted for security
- Supports all PHP versions from 5.2 to 7.0
How to backup and restore with UpdraftPlus
First, you must install and activate UpdraftPlus. You can refer to the plugin manual to know how to install a WordPress plugin.
Once installed and active, you can find the plugin configuration in Settings -> UpdraftPlus Backups

Configure UpdraftPlus in Settings -> UpdraftPlus Backups
Step 1 : Make a backup plan and choose a backup storage location
You access the Settings section on the management screen of the UpdraftPlus plugin.

UpdraftPlus Settings screen
Here, you can schedule source code backup (Files backup schedule) and database (database backup schedule).
Below you choose where to store the backup. By default, UpdraftPlus will store the backup file right on the web server. That puts you at risk of losing both your website and backup files at the same time.
Therefore we have to choose where to store the remote. Of the storage services, you should choose Dropbox because the Dropbox storage configuration is the simplest. If you don’t have a Dropbox account, sign up for one. And you will get 2 GB of free storage. This capacity is enough to serve the backup of a WordPress website.
Read more : How to backup website to Google Drive
After you select Dropx, a link will appear. But do not rush to click on the link, press the Save Changes button first to let UpdraftPlus know that you are choosing Dropbox as the remote storage.
After clicking Save Changes , click the link to allow UpdraftPlus to use your Dropbox account to store the backup file.

DropBox Authentication Link
You will be redirected to the Dropbox login screen. After logging in, click Allow to allow UpdraftPlus to access your Dropbox.

Click Allow to allow UpdraftPlus to use DropBox
Finally you are redirected to UpdraftPlus management screen in WordPress Dashboard with success message

DropBox verification message successful
Step 2 : Perform website backup
You are now ready to backup your WordPress site.
Click BackupNow. A dialog box appears allowing you to select the components of the backup. By default, if you do a full backup UpdraftPlus will create 5 files: database, theme, plugin, upload folder, and other folders included in wp-content.
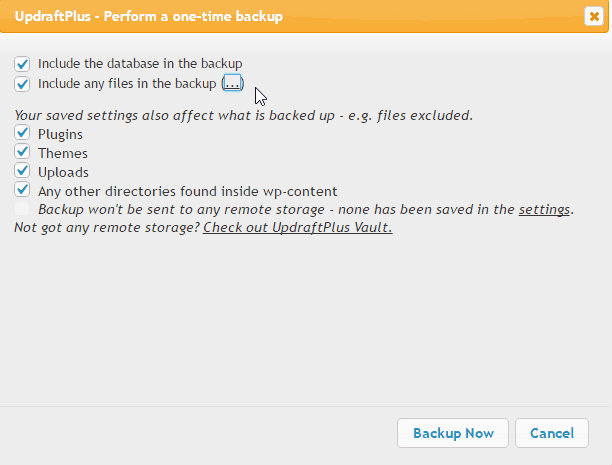
Select components to backup
After selecting, click Backup Now to proceed with the backup. You will see a bar indicating the progress of the backup.

Backup status bar
This is a successful backup message

Notification of successful backup
Now let’s go to Dropbox to see how Updraft organizes backup files. As shown below UpdraftPlus creates a folder named Updraft Plus in Apps of Dropbox. Inside the folder will not contain the backup file. As I said above, if you do a full backup, there will be 5 backup files in all.

The UpdraftPlus folder contains the backup file in Dropbox
Step 3 : Proceed to restore the website
Restoring your website from backup files is very simple. You just switch to the tab named Existing Backups.
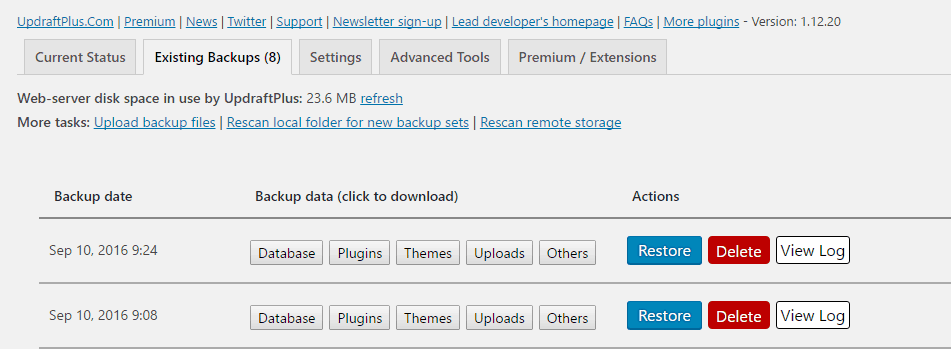
Existing backups screen
Here, you will see a list of backups. You can download the backup file you want. To restore, simply click the Restore button at the backup time you want. The Restore backup screen appears. Select the component you want to restore and click Restore:

Select the recovery component
Click Restore again. At this time, do not close the browser window to avoid affecting the website recovery process.
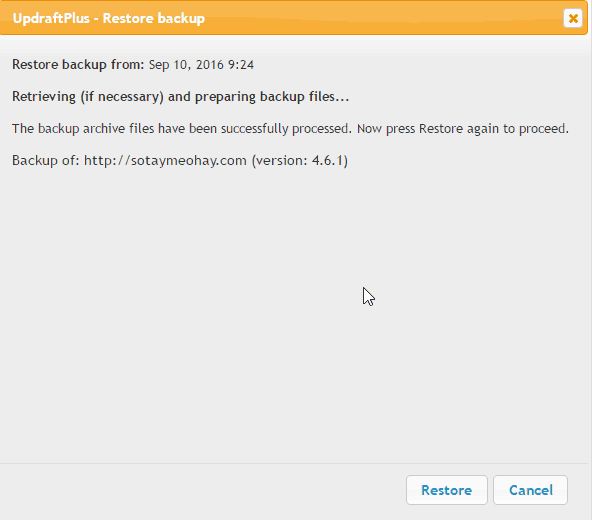
Click Restore to start the restore
The restore process is complete, you will see the success message as below

Notice of successful website restoration
Note: after restoring to avoid 404 error, you need to do the same next step as manual restore. That is you go to Settings -> Permalinks and press the Save Changes button. That’s it, you have completed the data recovery process.
Epilogue
Above, you learned how to backup and restore your WordPress site using the UpdraftPlus plugin.
As always, if you have any trouble with this plugin, leave a comment below.
Icon made by http://www.flaticon.com/authors/freepik from www.flaticon.com


