

Right after installing WordPress , probably the first thing you do is install the plugin. Plugins help add functionality to WordPress such as backup data, shorten links and so on.
The beauty of WordPress is that there are thousands of free and paid plugins for you to choose from.
In today’s post, I will show you step by step how to install a WordPress plugin
Note: If you are using WordPress.com you cannot install the plugin. See the details of the differences between WordPress.com and WordPress.org here .

Contents
How to install a WordPress plugin
We have 3 different ways to install a WordPress plugin: using the search feature, uploading the plugin, and manually installing the plugin using the File Manager.
Install the plugin using the plugin search feature
The simplest way to install a WordPress plugin is to use the plugin search feature. This method is only applicable to plugins located in the WordPress.org plugin repository . These are all free plugins.
First you need to login to your WordPress admin and go to Plugins -> Add New
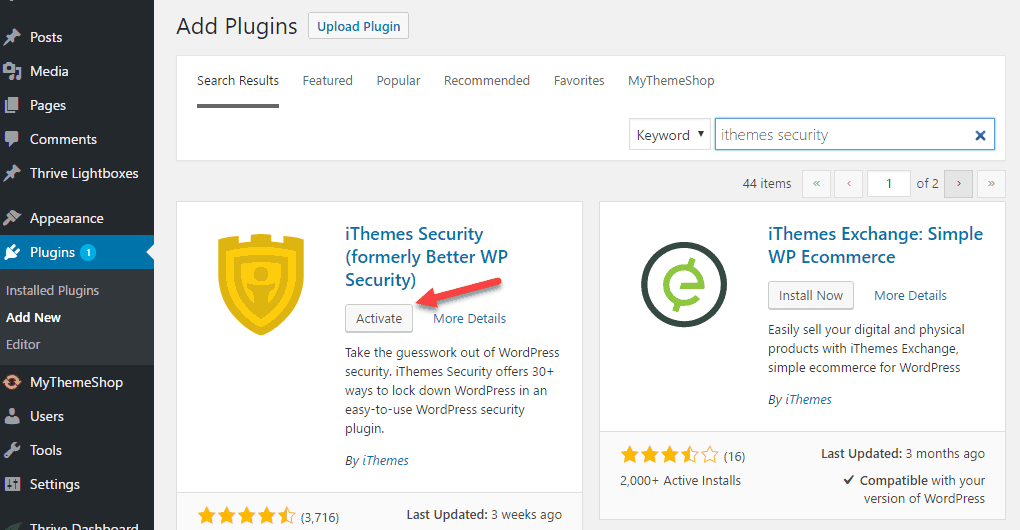
Search for a plugin by entering the name of the plugin or function you are looking for in the search box. Then you will see a list of plugins like below:

Here we look for iThemes Security which comes up first in the search results. So we go to the Install Now button next to the plugin’s title.
WordPress will now download and install the plugin for you. After successful installation, the Install Now button will change to the Activate button. You click the Activate button.
With that, you have successfully installed a WordPress plugin.
Some plugins are already working with no additional configuration required. Others require you to have the proper settings. These settings vary from plugin to plugin. So I can’t cover that in this article.
Install the plugin using the plugin upload function
Paid plugins will not be in the plugin repository on WordPress.org. We cannot install using the first method.
That’s why WordPress has an Upload function to install such plugins. I will show you how to install the plugin using the upload option in the WordPress Admin
First you need to install the plugin from source. The plugin will be a zip file. To help you visualize the paid plugin installation in detail, we will try to install My WP Backup Pro . A plugin by MyThemeShop that helps you create professional website backups.
Here we download the plugin from within the dashboard of MyThemeShop. The process is similar for other paid plugin providers.

Then, inside the WordPress Admin, you go to Plugins -> Add new.
Next, click on the Upload button.

This takes you to the plugin upload page. Here you click on the Choose file button and select the plugin which is the plugin zip file you just downloaded above.
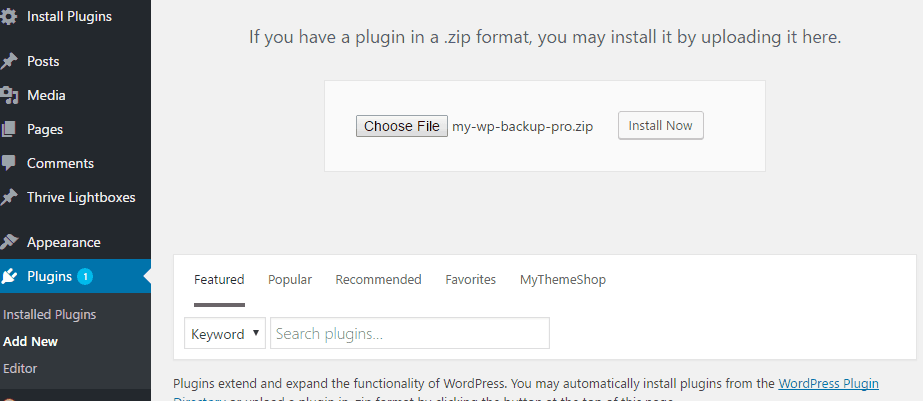
After you have selected the file, click the Install Now button.
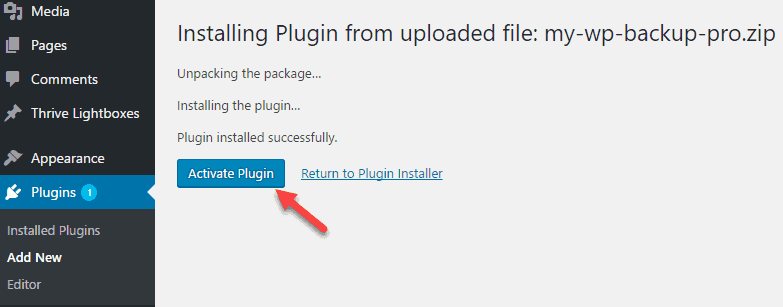
WordPress will now download the plugin from your computer and install it for you. You click on the Activate Plugin link. It’s done like that.
Note : If you have an error that the upload file size exceeds the allowed size, see this article of mine to solve the problem
Manual plugin installation using File Manager
For this method, you can use FTP. With FTP, you need to download the plugin as a zip file. Then you extract this file to create a new folder with the same file name. Finally, you upload the entire folder to the wp-content/plugins value on the web server.
However, this method is very slow. So I recommend you to use File Manager to upload zip files. Then you extract this zip file on the server. Specific details on how to install you continue below.
For some reason you cannot install the plugin using the above 2 methods, you can install the plugin manually using File Manager. File Manager is the manager included in cPanel. If you’re new to cPanel, check out my cPanel manual .
First you need to download the plugin as a zip file to your computer. Next you need to login to cPanel. Then click on File Manager. Next you move to the location /wp-content/plugins. Click the Upload button on the toolbar:

Drag the plugin’s zip file into the upload area.

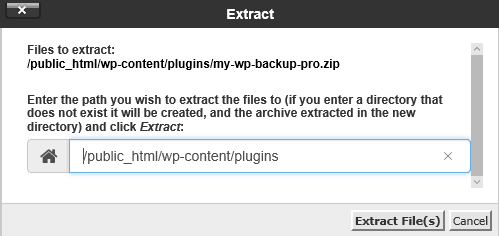
After the upload is complete, you return to the File Manager. Click the reload button, you will see the zip file of the plugin. Right-click the file and select Extract from the context menu.
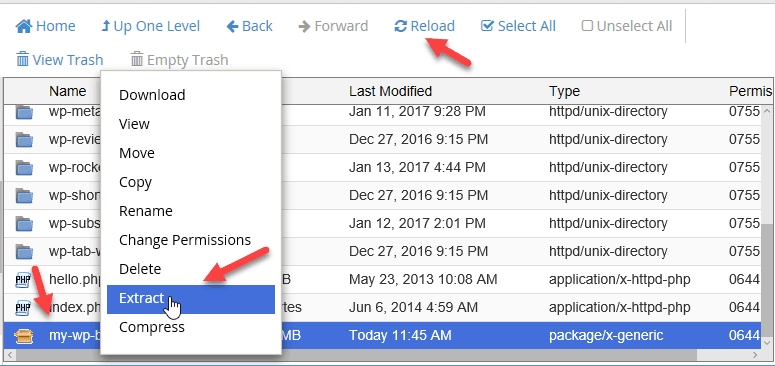
A dialog box appears asking you to choose a storage location. You just need to click the Extract File(s) button . Now you can delete the zip file you just uploaded.
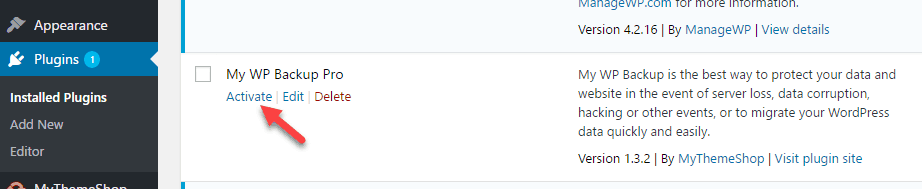
Finally, you go to the WordPress Admin. Click Plugins. You will see the plugin you just uploaded. Click the Actiate button. Like that’s it. You have successfully installed the WordPress plugin manually.
I hope this article helped you learn how to install a WordPress plugin.
If you have problems with the WordPress plugin installation, leave a comment below.
And don’t forget to like or share the article to support . Thank you.
Read more : Summary of essential plugins for WordPress
Credit:icon made by http://www.flaticon.com/authors/madebyoliver from www.flaticon.com


