

With SharedHost, installing WordPress is pretty straightforward .
You just need to go to cPanel and use Softaculous to install WordPress with a few mouse clicks.
But VPS is another story.
It’s a little more troublesome. But it’s not too difficult.
First you need to create a VPS like this guide if you don’t have a VPS yet. Or you can refer to other quality cheap VPS services .
After you have a VPS with a brand new CentOS operating system, you will proceed to install WordPress as instructed below.
This article will use HocVPS’s script to install the necessary components to run a WordPress website.
This is also the easiest way for those who are new to VPS.
Here are the steps to install WordPress on CentOS using HocVPS’s script
Contents
Instructions for installing WordPress on CentOS 6/7 using HocVPS script
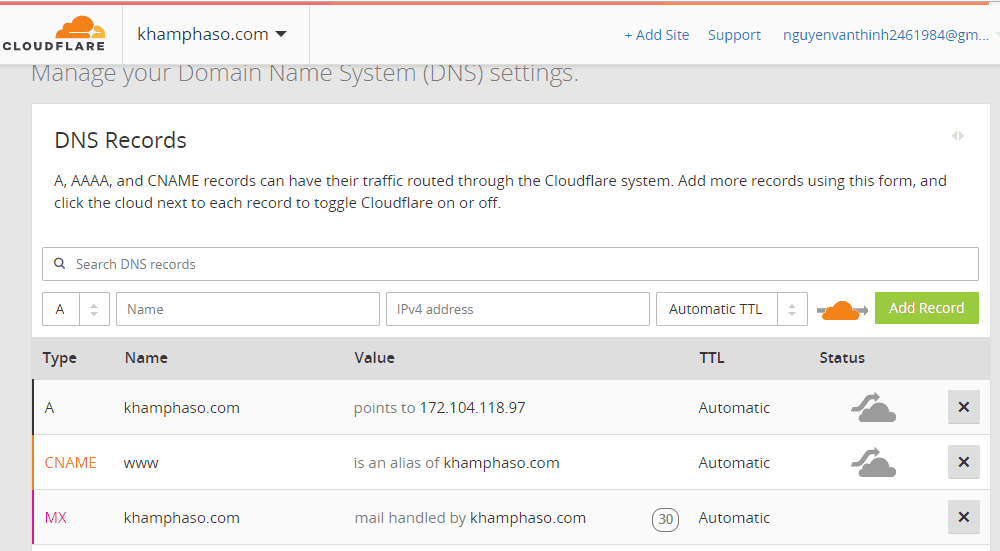
Step 1: Point the IP from the domain to the server.
First, you need to make sure that your domain is pointing to the VPS service provider’s server.
I usually use CloudFlare as DNS . So in CloudFlare’s DNS tab, I just need to enter the IP address for the A record as below:
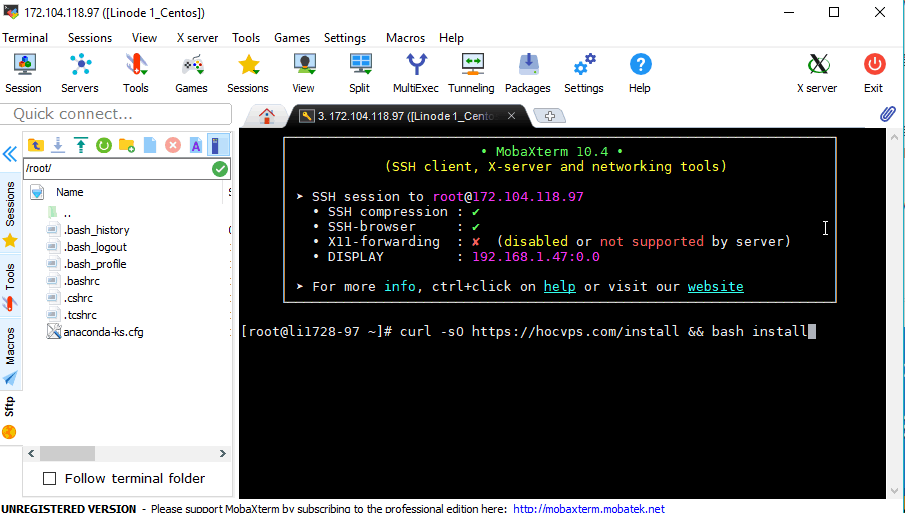
Step 2: Connect SSH to the server and install HocVPS
Next you need to connect to the server using an SSH client.
If you do not know the SSH client tool, see how to connect to the server using MobaXTerm .
After successful connection, run the command below:
|
1
|
curl –sO https://hocvps.com/install && bash install
|
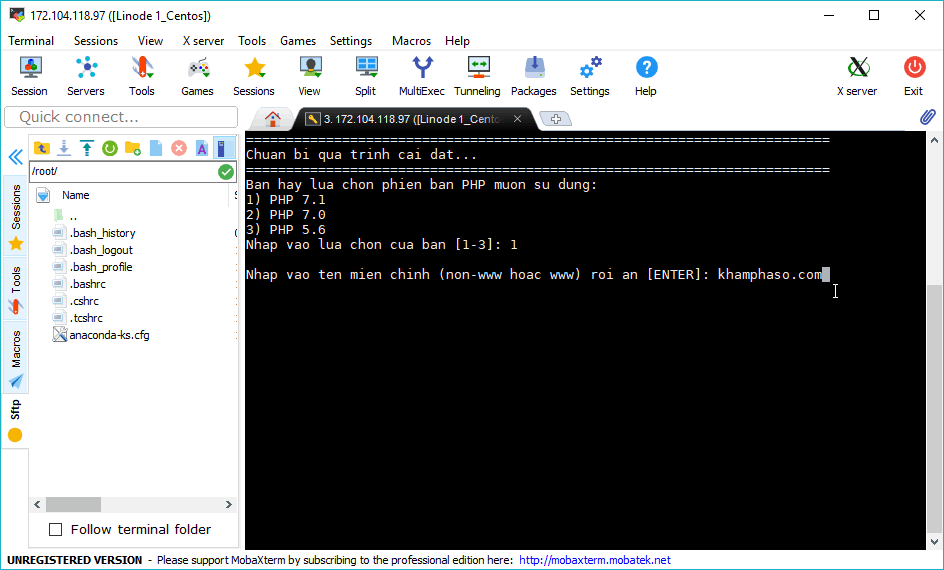
The script will ask which version of PHP you want to install. Type 1 then Enter to select the latest PHP 7.1 version.

Continuing, the script asks which domain you want to add. Type in your domain name and then Enter.
Next enter the admin port. Port admin is the port (between 2000-9999) to access management tools after installing HocVPS with the following path:
- Administrative Tools: http://domain.com:port/
- phpMyAdmin Tools: http://domain.com:port/phpmyadmin/
- File manager tool: http://domain.com:port/filemanager/
- System health monitoring tool: http://domain.com:port/serverinfo/
- Zend Opcache Tracker: http://domain.com:port/op.php
Note: you should avoid choosing the same port as the port of the services running on CentOS as listed here .
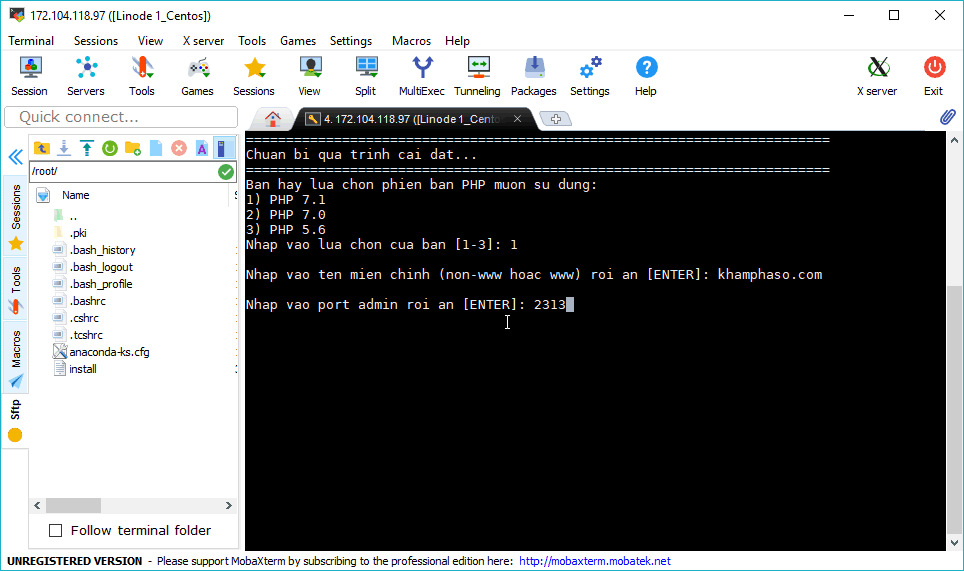
After entering the port and Enter wait a few minutes HocVPS has been installed.
Now you need to reconnect to the server. Because HocVPS changed the SSH connection port from the default 22 to 2222.
Therefore, you need to change the SSH port before connecting to the server. In MobaXTerm, edit session you need to change the port and enter the port value as below:

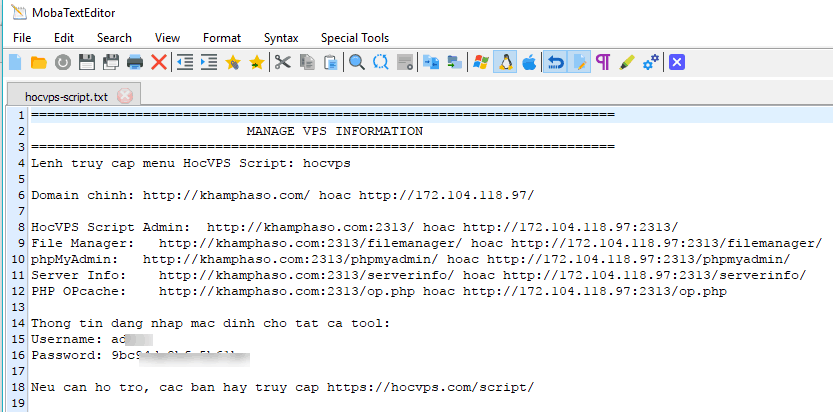
All important information of HocVPS will be kept in /root/hocvps-script.txt

We try to open the file content with Moba Editor: Right-click on the file and select Open with default text editor.
Here is my file content:
Step 3: Create the database
After successfully installing HocVPS in the terminal, type the command hocvps to open the control panel of this script.
We will use it to create a database for the website.
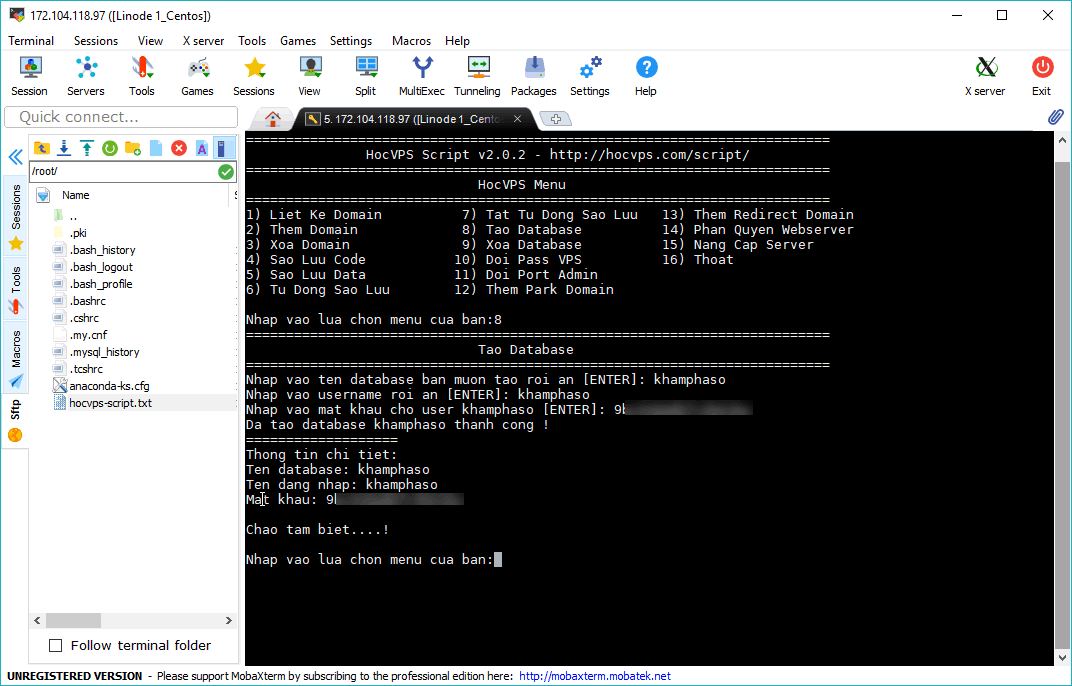
After typing hocvps and then enter you will see its panel as below.
Next, enter 8 and then Enter. The script will ask you to enter the following information: database name, username and password.
After creating the database, select 16 and then enter to exit HocVPS.
Step 5: Install WordPress
After you add the domain name as above, HocVPS will create a folder containing the website’s code with the following path:
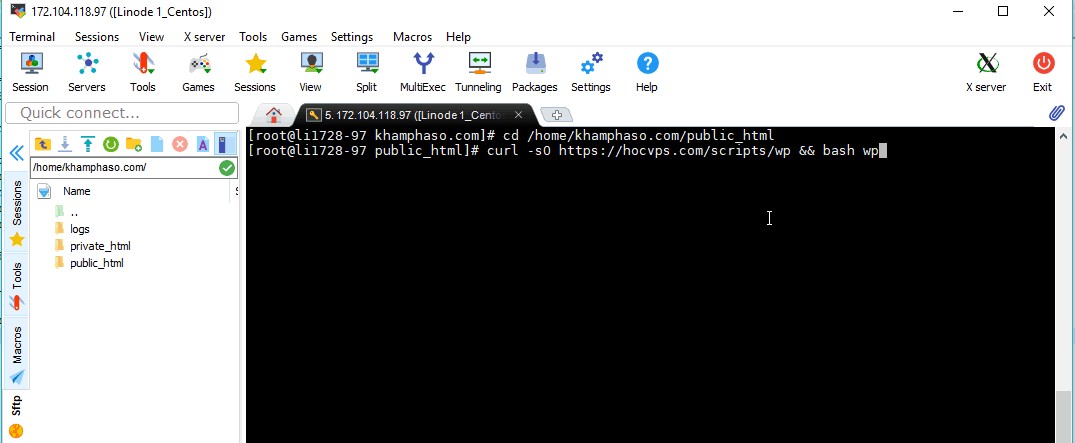
/home/yourdomainname/public_html. My example is /home/khamphaso.com/public_html.
You need to move into this directory with the following command. Remember to replace your domain with yours.
|
1
|
cd /home/khamphaso.com/public_html
|
Next:
To install WordPress, copy the command below and paste it into the terminal and press Enter. This is also a hocvps WordPress installation script.
In fact, this side has a script to install HocVPS and WordPress at the same time. But it’s best to separate it for easy handling when you encounter an error.
|
1
|
curl –sO https://hocvps.com/scripts/wp && bash wp
|
During the WordPress installation, the script will ask you for the following information:
Host of the database : enter localhost
Name of the database : Use the information you created in the step above.
Username and password of the user you created in the step above. Once
in a while the script will automatically install WordPress to the /home/domain/public_html directory.
You can now access your domain and install WordPress via your browser as usual:
It’s done.
You already know how WordPress on CentOS uses HocVPS scripts.
Good luck.


