
Memcached is also a way to speed up website processing. In particular, Memcached is often combined with the W3 Total Cache plugin as a way to speed up WordPress websites
When talking about Memcached we usually talk about 2 components:
- Memcached Server: we will install a server that handles how
- Memcached module: module in PHP to communicate with Memcached server
The memcached model I mentioned in this post

With VPS you have the option of whether you want to use Memcached or not. ShareHost depends on whether the provider has this feature or not?
Today’s article I will guide you to install Memcached on CentOS 7.
Install Memcached server:
First we install the first component of the Memcached system with the following command:
yum -y install memcachedThe following command to start Memcached:
systemctl start memcachedTo make Memcached run on server restart, use the following command:
systemctl enable memcachedUse the following command to check if memcached is up and running:
ps aux | grep memcachedConfigure Memcached
The memcached configuration is located in the file /etc/sysconfig/memcached
nano /etc/sysconfig/memcached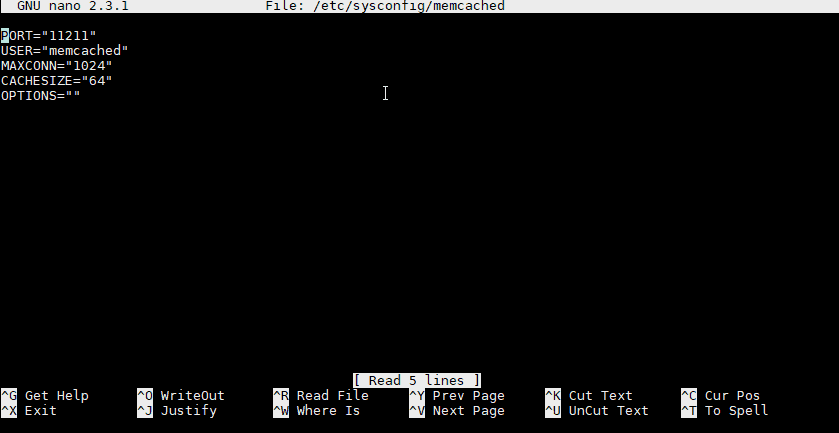
The cachesize part will be the RAM for Memcached. Default is 64MB. Here I increased to 128MB.
Restart Memcached to use the new configuration.
systemctl restart memcachedInstall the Memcached PHP Module
For Memcached to work with PHP you need to install the Memcached Module
In the series of articles about LEMP on CentOS, I use PHP 7.1, so I will install it with the following command:
yum --enablerepo=remi,remi-php71 install php-pecl-memcached php-pecl-memcacheRestart PHP-FPM: systemctl restart php-fpm
Now go to the W3 Total Cache configuration and select Memcached for Page Cache, Database Cache and Object Cache.


