

In the previous post, you learned how to register for a Linode VPS to receive 4 months free use.
After Linode successfully activates your account, you are ready to create a VPS.
Let’s start creating the first VPS at Linode.
Contents
Step-by-step instructions for creating a Linode VPS
Step 1: Choose a suitable VPS package
First you go to the Linode Manager page .
A screen will appear allowing you to choose a suitable VPS plan.
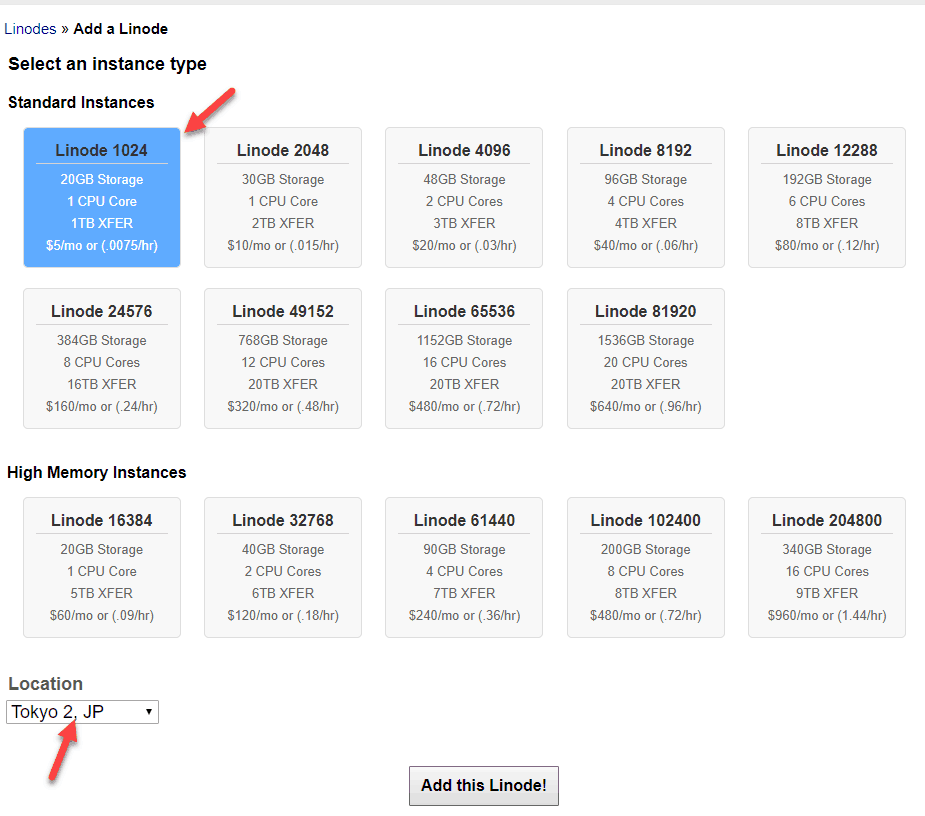
Depending on your individual needs, you can choose a suitable package. If you are just starting to develop a website you can simply choose the lowest plan for the economy.
Later you can easily upgrade to a higher plan with a few mouse clicks. Nothing affects your website at all.
After choosing a suitable plan, you need to choose a location. If your website is in Vietnamese, you can choose either location Tokyo or Singapore to get the optimal speed to Vietnam.
Click the Add this Linode button to start creating VPS.
Step 2: Install the operating system.
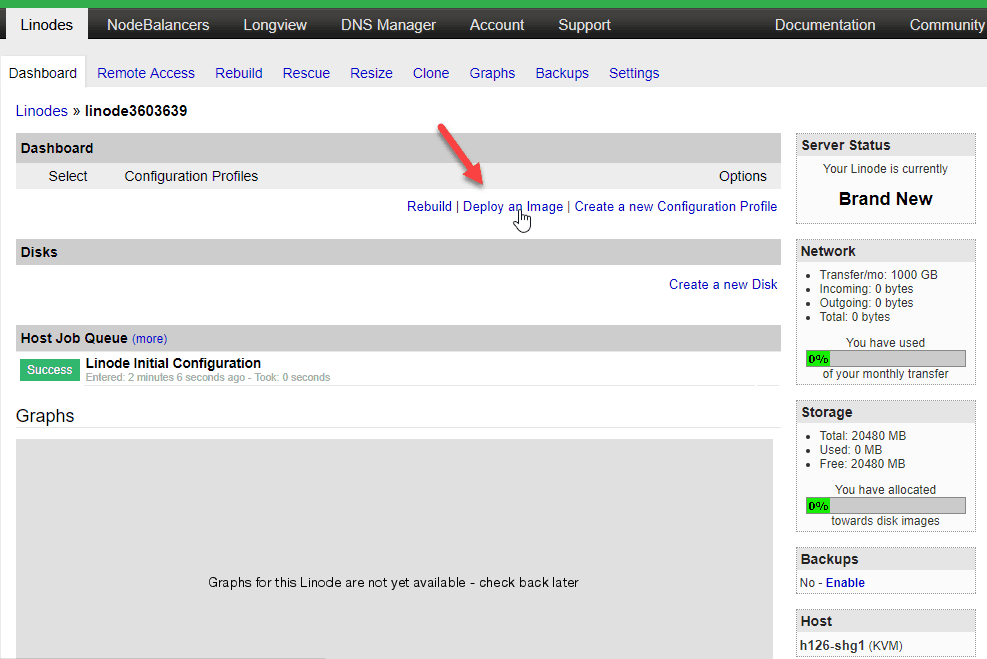
You will now switch to a screen showing a list of how the server you have created. Click on Dashboard to start installing the operating system

On the next screen, click on the Deploy an Image link .
You will go to the Deploy screen.

In Image , you choose the operating system. In this article we will choose CentOS operating system.
But you can also choose Ubuntu then install WordPress using EasyEngine . This way is sometimes simpler than CentOS. Suitable for those who are not technically savvy.
Linode allows you to create swaps as soon as you install the operating system. But the maximum Swap size is 512MB. Pretty low.
Basically, you need to make the swap space twice as much as Ram. Here I choose the lowest package 1GB Ram.
So swap size should be 2GB.
But the screen only gives a maximum of 512M, so the hard drive I leave for this swap. You can adjust this swap space when the operating system is installed.
For example, my hard drive is 20GB. I left about 2GB for swap.
Finally, enter the password for the root account. You will use it to login to the server as shown below.
Click the Deploy button to start the operating system installation.
This is the screen after Linode has installed Centos 7. You click the Edit button in the swap disk section to adjust the swap space.

On the next screen, you just need to increase the swap capacity to double Ram as I said. It’s done.
Now click on the Boot button to turn on the server.
We will try to connect to the server.
Step 3: Connect to Linode . server
To connect to the server, you need the following information:
The server’s IP address. The root account with the username as root and the password is what you provide in the operating system installation step.
Regarding the IP address, click on the Remote Access tab. Here you will see the prominent IP address right at the top.

Once you have all the information you need to use an SSH client tool to connect to the server.
See instructions for using MobaXTerm to connect to a Linux server.
Now you start to install WordPress on CentOS .
Wish you success!


