

In the process of managing a website, it is difficult to avoid the situation of having to switch to a new host.
Switching hosts is actually backing up your website and restoring the backup on the new host.
You can do this manually.
But there is a much simpler way. That is using the Duplicator plugin .
Basically, Duplicator backs up the entire website and outputs two files. A file containing the source code and data of the website. The other file is the executable file that helps you restore the website on the new host.
You just need to copy these 2 files to the new host. And Duplicator makes it easy to restore an entire website.
Ok. That’s how Duplicator works.
Now, we will go into detail about the process of using Duplicator.
How to use Duplicator
First, you install and activate the plugin.
After that, a new menu with the name ‘ Duplicator ‘ appears in the WordPress Dashboard. Click on that. Duplicator notifies you that there are no packages available. Click to create a new package. You can also create a new package by going to Duplicator -> Packages -> Create New .

You will now see a screen like the one below. Click next to continue.

Duplicator will scan your website and provide a detailed report. This report contains many parameters that indicate whether your website can create packages or not.

You don’t have to pass all the entries. It’s okay to have a few items with a warning. Click the Build button to start the package creation process.
Fast or slow time depends on the volume of your website data.
Once done, Duplicator will provide you with 2 files: installer.php and archive. You download both files to your computer.

Now we will proceed to restore your website on another host.
You upload the 2 files downloaded above to the new host. You can use FTP or FileManager in cPanel.
Next, run the installer.php file under the path http://yourdomain.com/installer.php . You replace yourdomain with your domain name.
From the screen that appears, select Create New Database . And enter the information for the new database. Click Test Connection to check if the information you entered is correct. If the information is OK, click the Run deployment button to proceed with data recovery.

The next screen you will see the old and new path information. You click on Adanved Options to replace the old admin account with the new admin account if you want.

If you are OK with all the information, click the Run update button to continue.
Finally, you will see the screen as below. It means the data recovery process was successful.
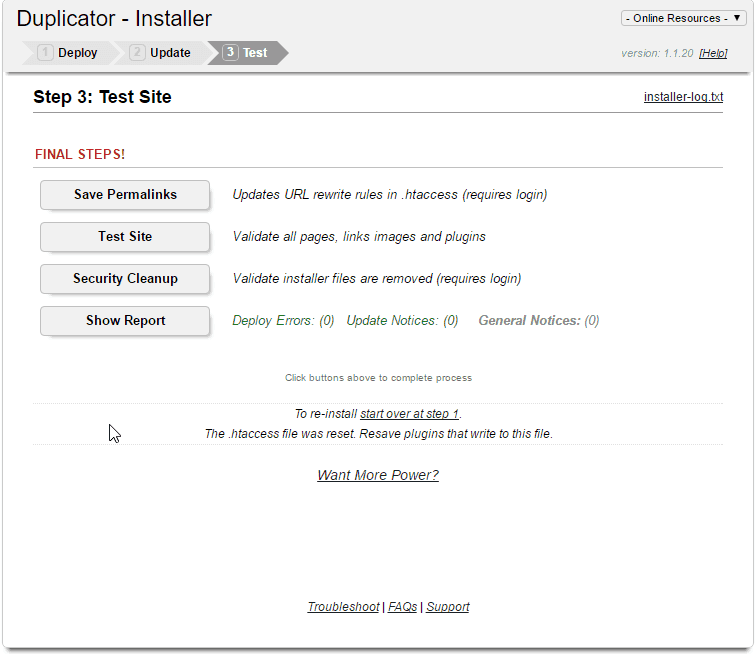
Now you need to do a few things:
- Go to Settings -> Permalinks and press Save Changes .
- Go to Duplicator -> Tools -> Cleanup , click Deleted Reserved Files to delete the backups.
- Remove the Duplicator plugin.
It’s all about using the Duplicator pugin.
Remember to use it when you need to migrate to a new host.
If you have any problems with this plugin, leave a comment below.
Good luck to you!


