

You want to learn how to use WordPress .
But you are not ready to have a complete website yet. In other words, you don’t want to buy a host or domain yet.
Installing WordPress on localhost is the logical solution for you.
You can focus on learning how to use WordPress without worrying about hosting administration. Or choose a domain .
Buying domain and hosting is more suitable when you have a specific website development plan in hand.
In this article I will give you a complete guide on installing WordPress on localhost.
You will learn how to install localhost with XAMPP. Then you will understand the steps required to install a WordPress site on localhost.
First, let’s learn what localhost is.
Contents
1. Localhost turns a personal computer into a server
Localhost is a server built from your own personal computer. localhost itself works like a normal web server. After setting up localhost, you can open a browser and enter the website address installed in localhost. Localhost will process this request and return the website you requested.
To run a WordPress website, localhost includes the following components:
- Webserver software called Apache.
- The PHP software (aka PHP compiler) is responsible for processing the PHP code because WordPress is written in PHP.
- MySQL Server software to store data for WordPress sites
- PhpMyAdmin software serves as a tool to administer MySQL databases. In other words, you use this software for tasks with databases such as adding databases, viewing tables, etc.
So how do you access the localhost environment?
First you install the localhost environment on your computer. You can then access localhost through a browser with the address http://localhost or http://127.0.0.1
2. Easy localhost setup with XAMPP
To install localhost, we use the popular software Xampp. Before installing Xampp, you need to note the following points:
a. If you use Skype
By default, localhost will work on port 80. While Skype is already using this port. So localhost won’t work. The solution to this problem is that you change the port of Skype. Specifically, open Skype -> Tools -> Options -> Advanced -> Connection and uncheck “Use port 80 and 443…”. Then enter any port for Skype to use. Finally click Save to save the result.

Remember to restart your computer to update the port system.
b. Turn off the firewall
If your computer has a firewall enabled from Windows or an anti-virus software installed, turn it off as it may block port 80 or other server applications.
c. Turn off User Account Control (UAC) on Windows
If you have UAC enabled, turn it off when using localhost to avoid permission restriction issues.
localhost installation instructions
Step 1 : Download the latest Xampp software:
You access the address https://www.apachefriends.org/download.html and select the version suitable for your operating system. Here I choose version 5.6.24

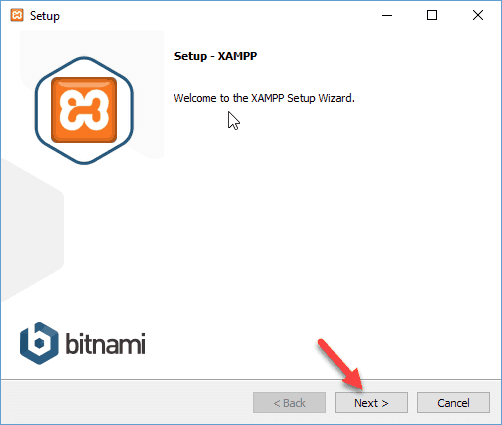
Step 2 : Click on the exe file you just downloaded to install. A dialog box will appear, select Next to continue.
Step 3 : In the step of selecting Components, you only need the necessary Components as shown below. Once selected, click Next .

Step 4 : Select the XAMPP installation directory
By default, XAMPP will install on the C drive. You should avoid the drive containing the operating system. As shown below, I choose the EASY drive

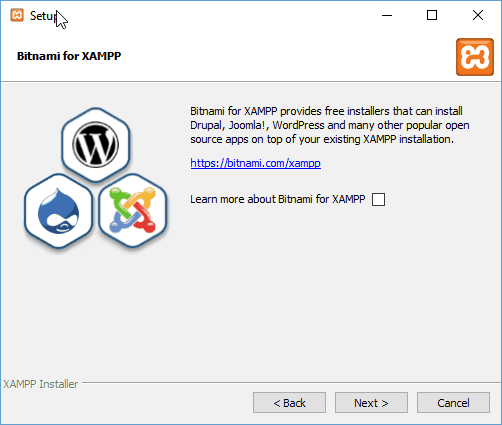
Step 5 : In the next dialog box, uncheck Learn more about Bitnami for XAMPP , then click Next .
Step 6 : Installation process:
At this point, XAMPP will be installed on your computer with the details you selected in the steps above. After XAMPP installs, restart your computer.
Step 7: Start localhost:
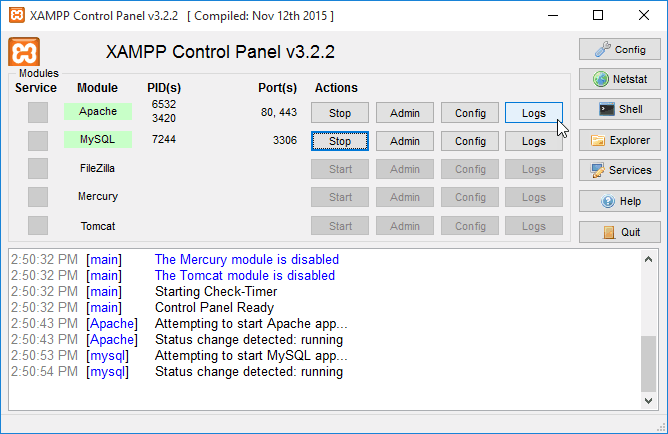
Go to the D:xampp drive , then click on xampp-control.exe to start the control panel of XAMPP.
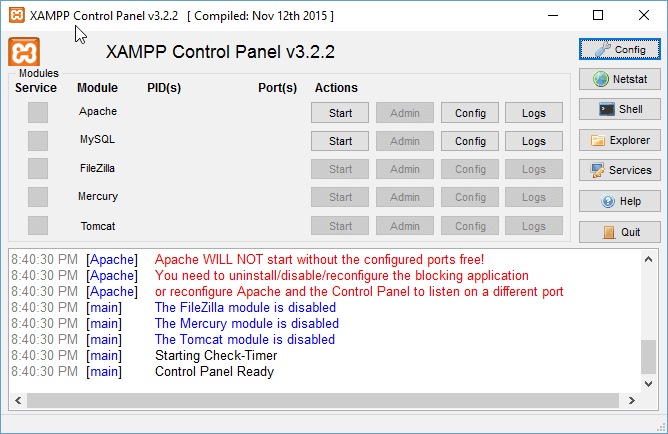
You will see two applications Apache and MySQL with a Start button. It means these two applications have not been started. You click on each Start button to launch the corresponding application.
If 2 applications turn green, it means the boot process is successful.
Step 8: Check localhost on browser
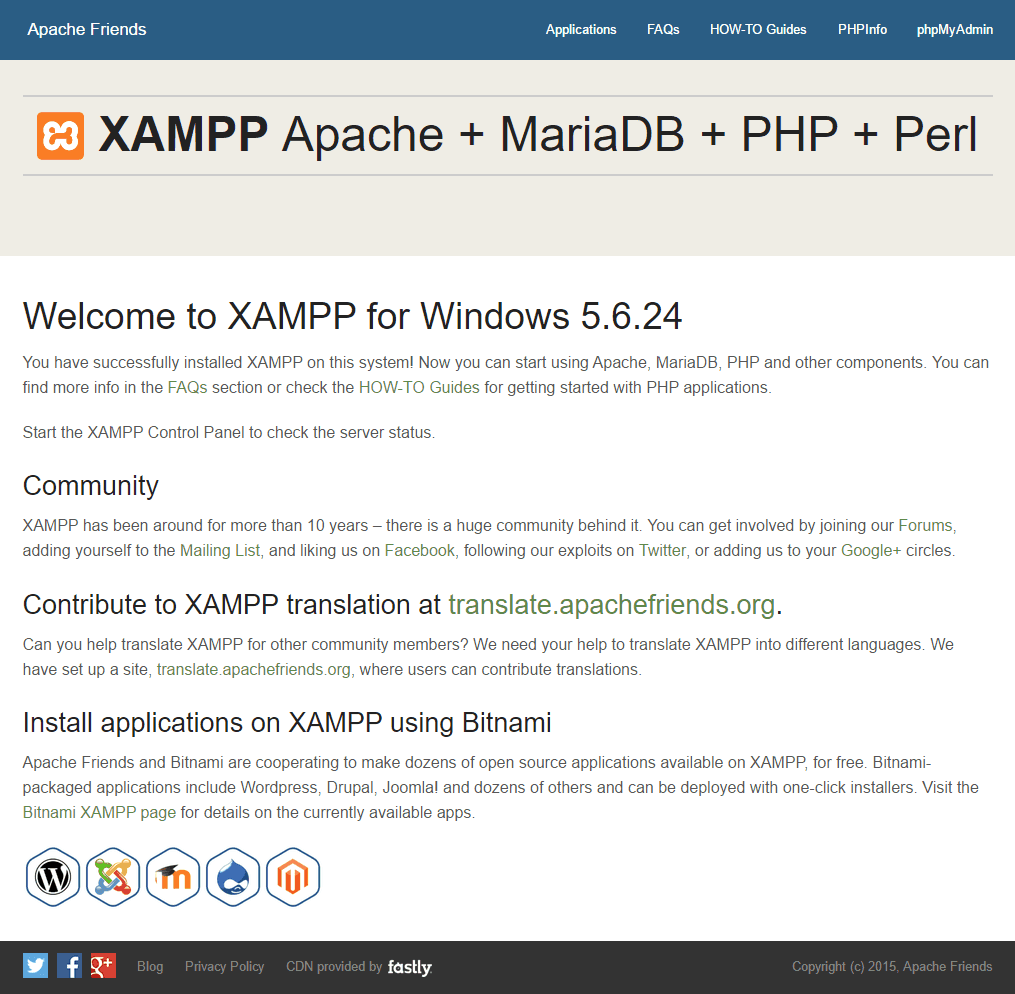
Open any browser, and enter http://locahost . If you see the screen below, you have successfully installed the localhost environment on your computer.
Next we proceed to create the MySQL database
3. Learn how to create a database (Database) MySQL
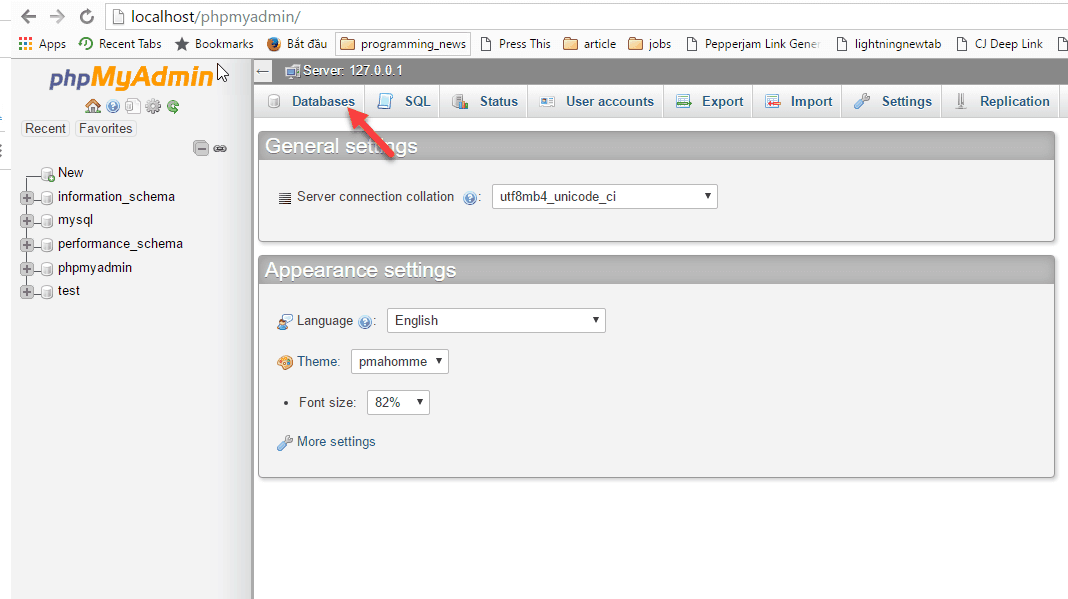
Step 1 : Access PhpMyAdmin
On the browser, you access the address http://localhost/phpmyadmin . The admin screen of PhpMyAdmin appears. You click on the Database button
Step 2 : You enter the database name. In the Collation section you choose utf8_unicode_ci . Finally press the Create button to create the database.

So we have created a database with the following information:
Database Host : localhost
Database user : root
Database password : blank
Database name : toolofblogger
You will use this information during the WordPress installation in the step below.
4. Power up localhost with virtual domain name
By default, you access localhost with the address http://localhost . However you can access with a virtual domain name such as http://local. .
Here I will guide you through the steps to configure a virtual domain name
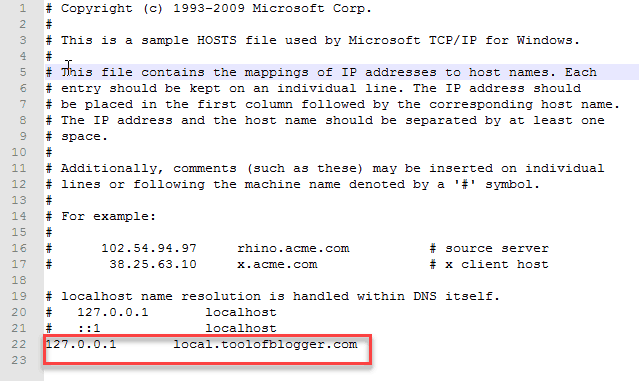
Step 1 : Set up a virtual domain name pointing to IP 127.0.0.1
You will make changes to the hosts file located in C:WindowsSystem32driversetc . To change this file, you need to edit permissions again.
First click on hosts, then select Properties

The dialog box that pops up, select Security -> SYSTEM , then click the Edit button

Next, select Users -> Select Full Control in Allow -> Select Apply
At this point, you have permission to edit the hosts file.
Open the Hosts file with NotePad or any text editing software. Add the text as shown below at the end of the file
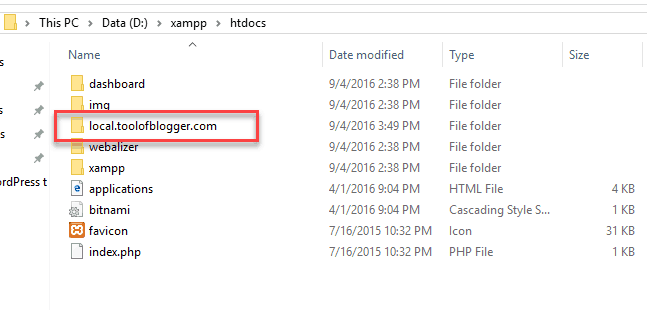
Step 2 : Create a directory in D:xampphtdocs
You navigate to D:xampphtdocs and create a directory with the name local. , the same name you configured in the hosts file.
Step 3 : Edit the file httpd-vhost.conf
Move to D:xamppapacheconfextra . Then open the file httpd-vhost.conf
Remove the ## sign in the NameVirtualHost line *:80
And add the following code at the end of the file:
<virtualhost *:80="">
ServerAdmin contact@local.thuthuatwp.com
DocumentRoot "D:/xampp/htdocs/local.thuthuatwp.com"
ServerName local.thuthuatwp.com
</virtualhost>
Notice you change the information to suit your environment.
Step 4 : Check if everything is OK
You open the browser, and enter the address http://local. . If you see the screen below, everything is working fine.

5. How to install WordPress on localhost
Step 1 : Download the latest WordPress version from WordPress.org
First, enter the following address: https://wordpress.org/download/
Click the download button to download the WordPress source code
After the download is complete, extract the zip file. Now you have the wordpress folder containing all the wordpress source code

Step 2 : Copy all the files in the wordpress folder to the local. folder that we created in the above step.

Step 3 : Run the installation process on the browser
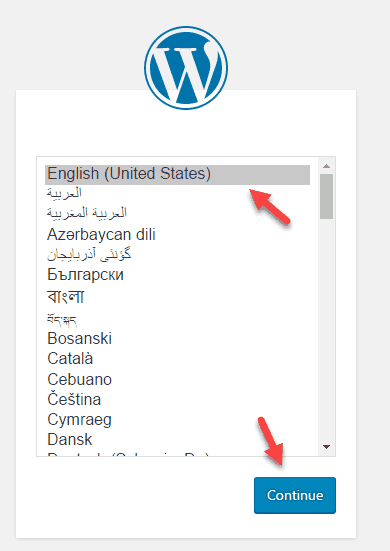
Enter the address http://local. in the browser. You will now see a screen to select the WordPress installation language. Select English and press Continue
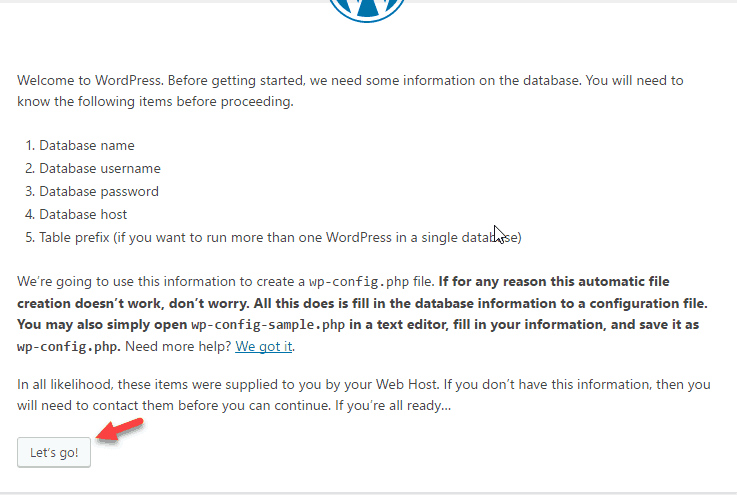
On the next screen, click Let’s go
Now we enter the database information that we created in the previous step. Click the Submit button to go to the next step.

If you entered the correct information, you will see the following screen:

Click the Run the Install button to start the installation.
In the next step, you will enter important information for the website: like the name of the website, username and password to access the admin page. After entering, click the Install WordPress button

The installation is successful, you will see the message screen as below:

WordPress will provide 2 systems: front-end and back-end. The back-end is the part of your website administration. Here you can perform a variety of website administration tasks such as writing, editing articles and so on.
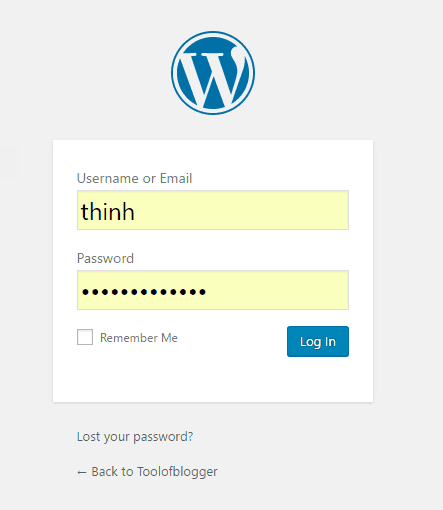
To access the admin page, enter the address: http://local./wp-admin . You use the username and password in the above step to log in
And here is the WordPress admin page interface

Regarding the front-end, this is the user interface, where visitors will visit your site. Enter the address http://local. , you will see the WordPress homepage after installation

Epilogue
So in this article, I have guided you step-by-step through the process of installing a WordPress site on a localhost environment.
First you know how to build localhost using XAMPP software. You also know how to use virtual domains in a localhost environment.
You have finally learned how to install WordPress through the web interface.
Now you are ready to practice and experience WordPress.
As always, if you have any difficulty with the above installation, please leave a comment below.


