

Today’s article I summarize the tasks you need to do after renting a Linux server.
This CheckList will help you new to VPS can visualize what you need to do. From there you have a Linux server that is both secure and performing well.
If you are using a shared host, see how to change your host from shared to VPS here .
Let’s just get started.
Contents
1. Connect to the server
After renting a Shared Host, the first thing you usually do is log in to cPanel . As for VPS, the first thing is to connect to the server.
To connect to a Linux server you need a tool called SSH Client. I recommend you to choose MobaXTerm . It’s free and has all the necessary utility features like sftp to help you upload and edit files without command line manipulation.
Maybe you already know, I want to mention it again. To connect to the server you need the IP address, password of the root user, a special user with full permissions in Linux.
This information you can easily get in the VPS management screen of the providers.
After connecting to the Linux server for the first time, you need to update the server with the following command:
CentOS
|
1
|
yum clean all && yum update –y
|
Ubuntu:
|
1
|
apt–get update && apt–get –y upgrade
|
2. Secure SSH connection to the server
Normally connecting to the server as above will be in the form of a password. Because the user everyone knows is root. Therefore, this type of login is not secure. Hackers can hack passwords.
You should connect using SSH Keys as instructed in this post . A more advanced form is to not use the root account anymore as this post instructs .
3. Set timezone for standard
Next you need to set the timezone to match the time in Vietnam. So when you run the cron job, it will be ready.
CentOS
You run the following command to set the timezone to Vietnam:
|
1
|
timedatectl set–timezone Asia/Ho_Chi_Minh
|
Double check if the setup was successful with the following command:
|
1
|
timedatectl
|
Next we need to synchronize NTP to keep the server stable with other servers.
Install NTP with the following command:
|
1
|
yum install ntp
|
Start the server and enable the service to run automatically when the server starts:
|
1
2
|
systemctl start ntpd
systemctl enable ntpd
|
Ubuntu
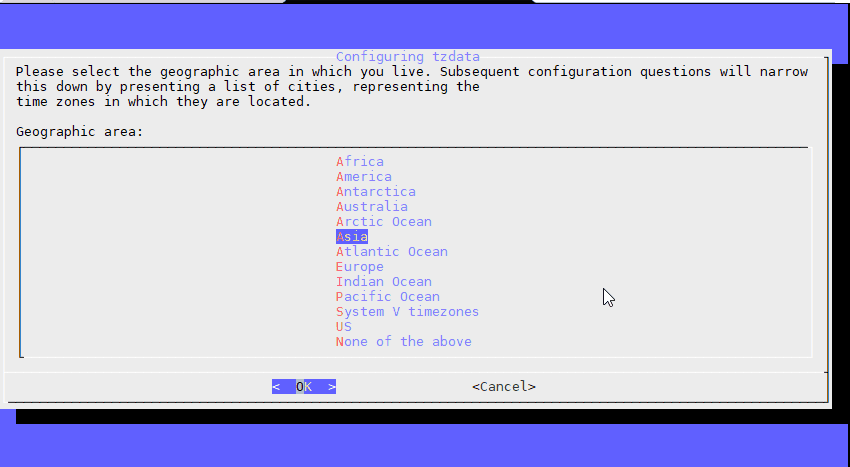
You reconfigure the tzdata package with the following command:
|
1
|
dpkg–reconfigure tzdata
|
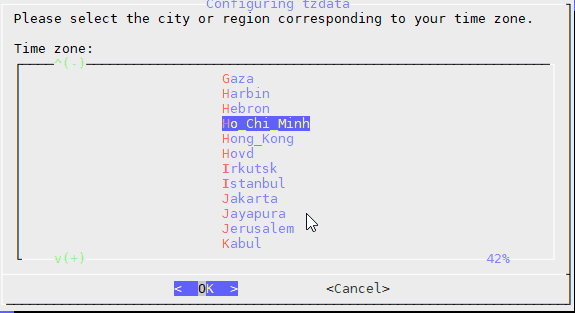
Select Asia region:
Choose Ho Chi Minh:
Install NTP with the following command:
|
1
|
apt–get install ntp
|
With Ubuntu NTP will automatically run you do not need to do anything else.
4. Create swap file
You need to create swap file as instructed to create swap file . Note: Some OpenVZ VPS services already create swap files for you, so you can skip this step.
5. Install the web server, WordPress and the Let’s Encrypt certificate
Of course this is the main goal when you rent a VPS. There are many options here.
If you install CentOS for VPS, you can refer to HocVPS or VPSSIM
If you install Ubuntu for VPS, you refer to EasyEngine script .
For those who have just switched to VPS, I recommend choosing VPSSIM because it is friendly to newbies.
6. Install a firewall for the Linux server.
The VPSSIM script has already installed you the CSF firewall, so you can skip this step if you use VPSSIM. Otherwise you can refer to CSF settings and configuration .
7. VPS Backup
Many VPS providers offer you VPS backup services. For example, Vultr has an option to backup VPS for $ 1 / month.
Alternatively, you can refer to backup VPS to Google Drive using Rclone .
Epilogue
Above are the tasks you need to do after successfully renting a Linux server.
After doing the above, you will have a secure, fast and stable Linux server and WordPress website.
Note: With the problem of sending and receiving email on VPS, it is best to use an external service like Yandex. See instructions HERE . Setting up a mail server on a VPS is often complicated and can be unstable.
If I am missing any important tasks, please add your comments in the comments below.


